Introducing our latest innovation: a Booking and Scheduling Webflow App/Plugin designed specifically for Webflow websites. This dynamic tool empowers users to effortlessly create and oversee bookings, appointments, customer interactions, payments, and service providers. With its user-friendly interface and a hassle-free no-code system, this plugin ensures a seamless experience. Utilizing this plugin is a breeze—simply connect it to your Webflow site and configure a few small settings for your booking preferences. Subsequently, embed the generated code into your website's designated div. You are now ready to embark on a journey of effortless booking and scheduling. Enhance your website's functionality with this powerful and intuitive solution.
How Booking & Scheduling Webflow Plugin Works
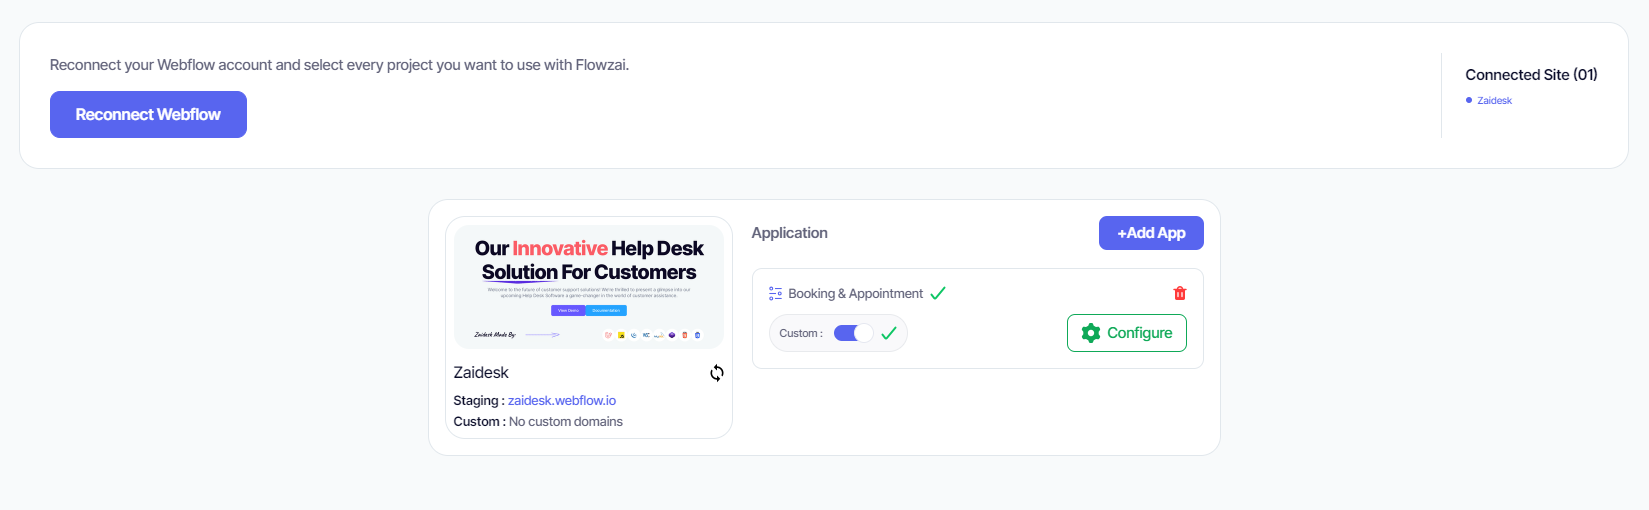
1. Connect With Webflow.
Unlocking the potential of "Getflowtools" is a straightforward process. Begin by logging into your account, and seamlessly integrate it with your Webflow account. Following this, effortlessly connect to the specific website or project of your choice, where you can easily incorporate the "Booking & Scheduling" Webflow plugin. Simple steps for powerful results – log in, connect, and customize your experience with ease.
2. Complete The Settings.
Moving on to the second step, it's time to fine-tune your connected site for optimal functionality. This involves a comprehensive configuration process to customize the booking experience:
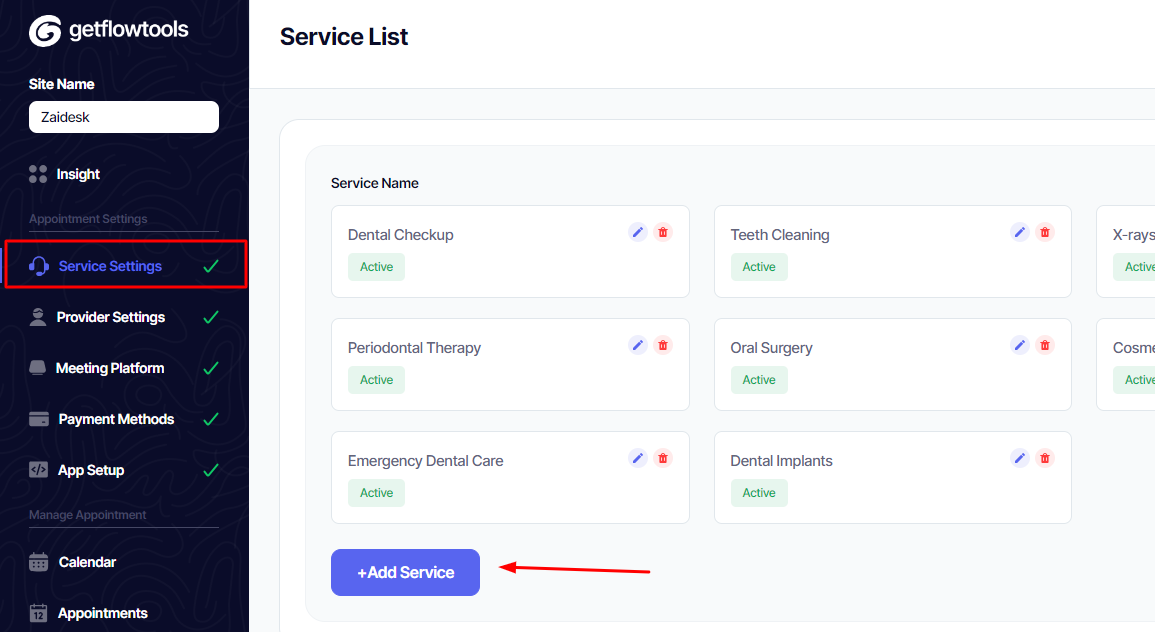
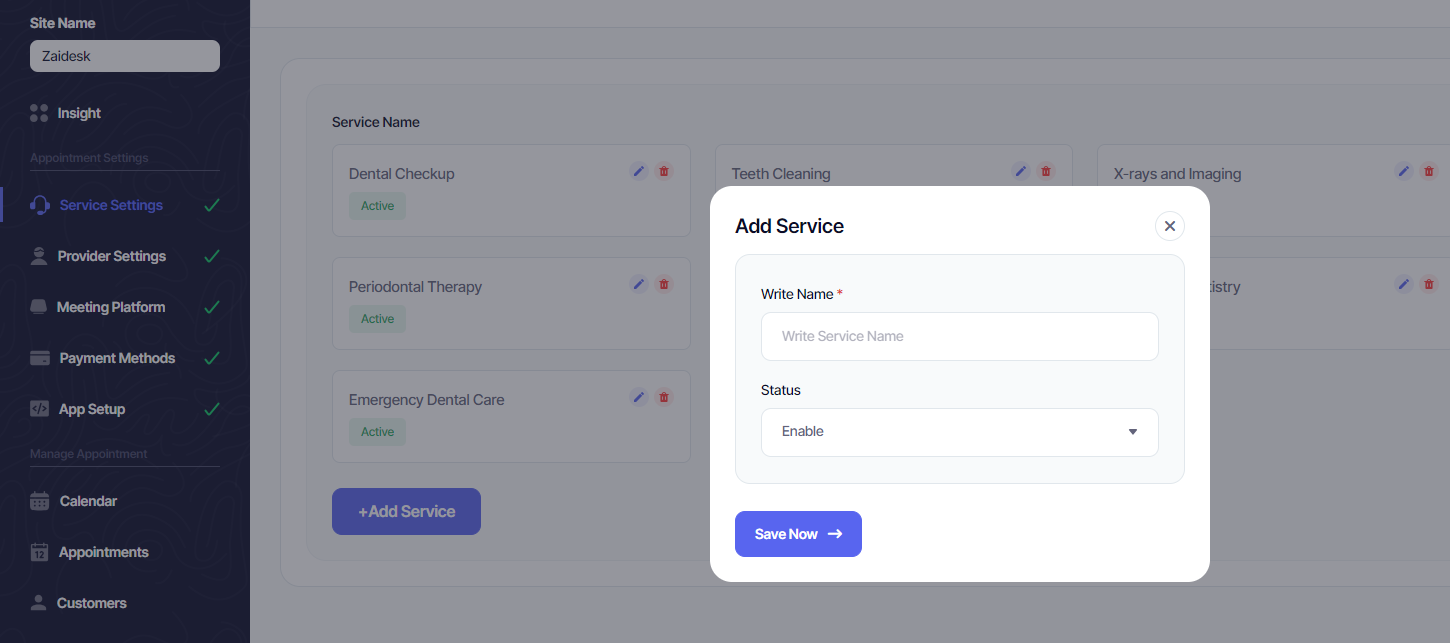
Add Services
Tailor your offerings by seamlessly adding the services you provide.
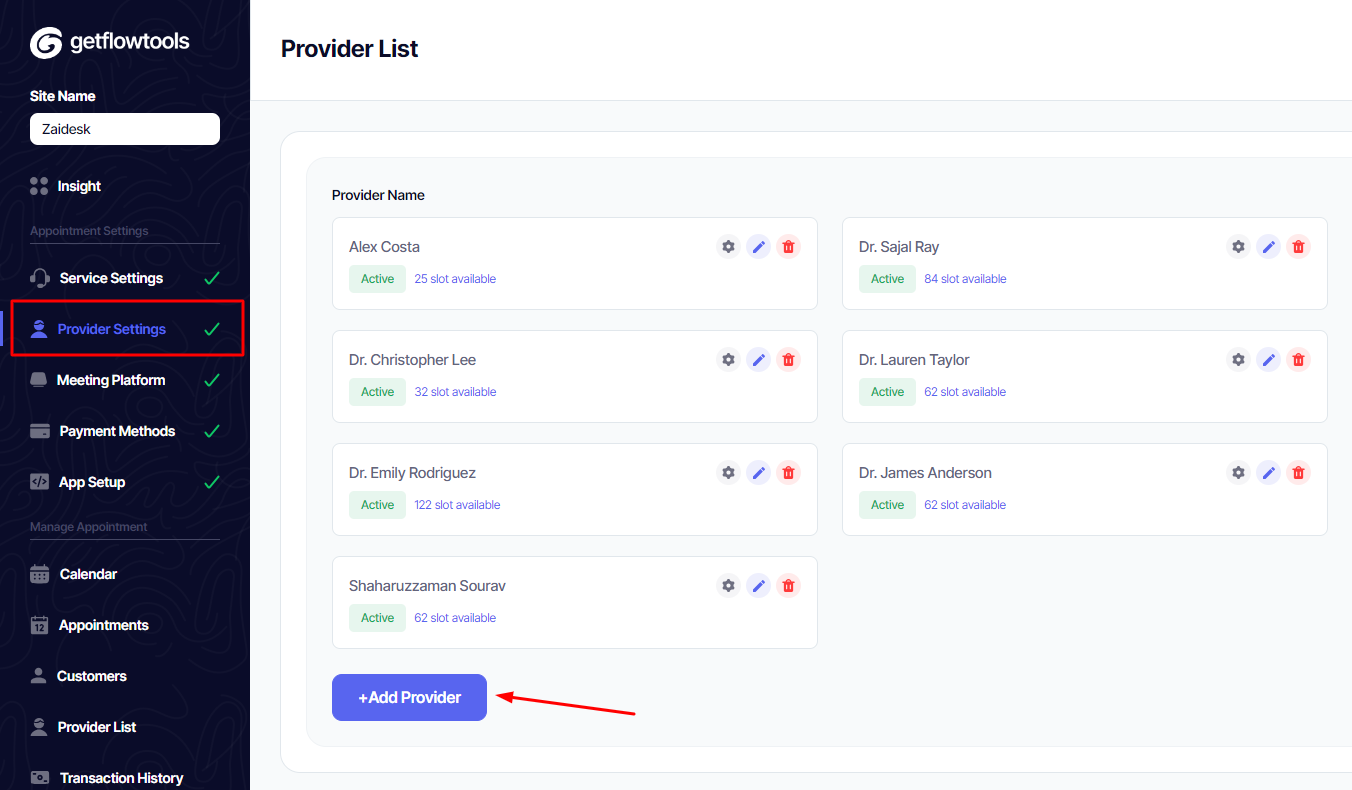
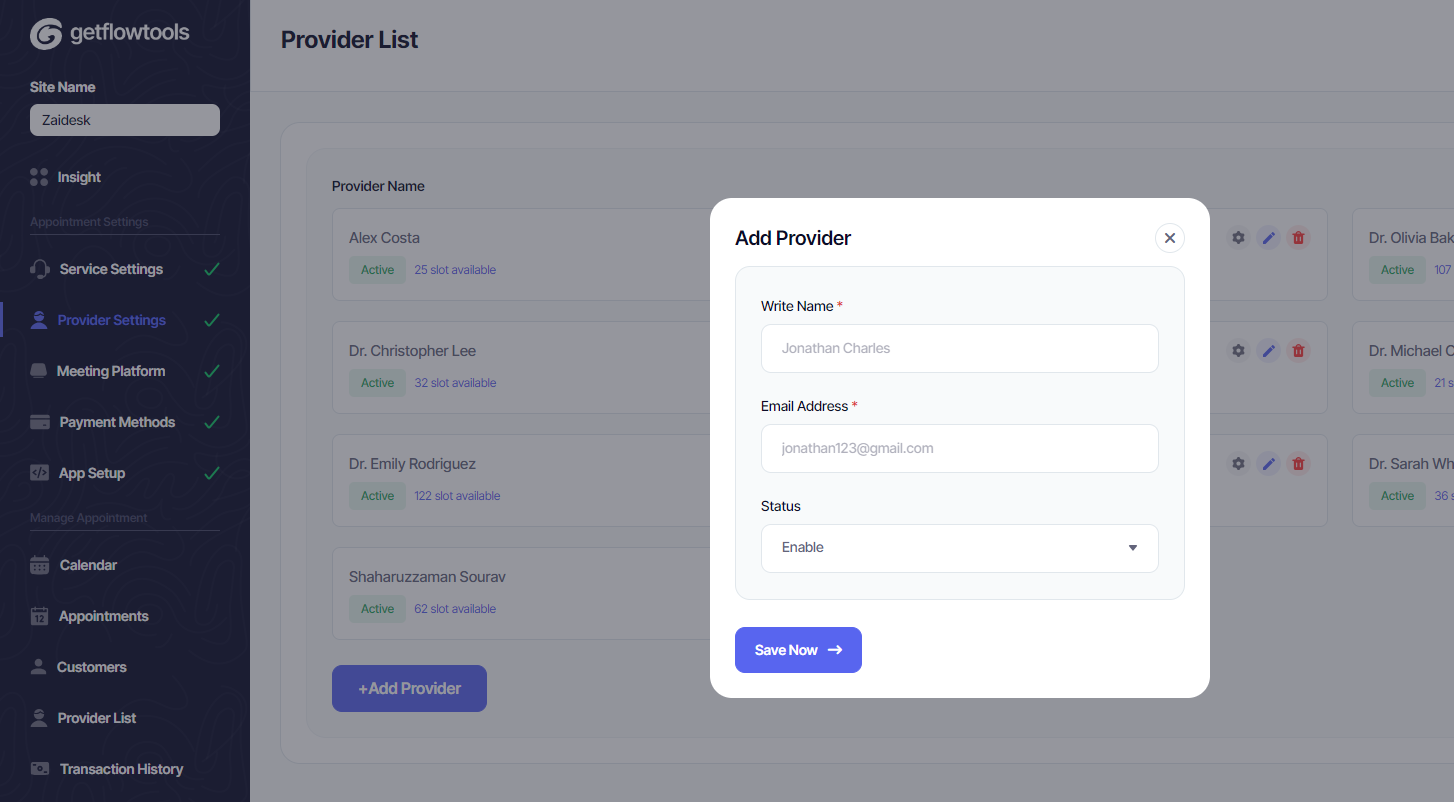
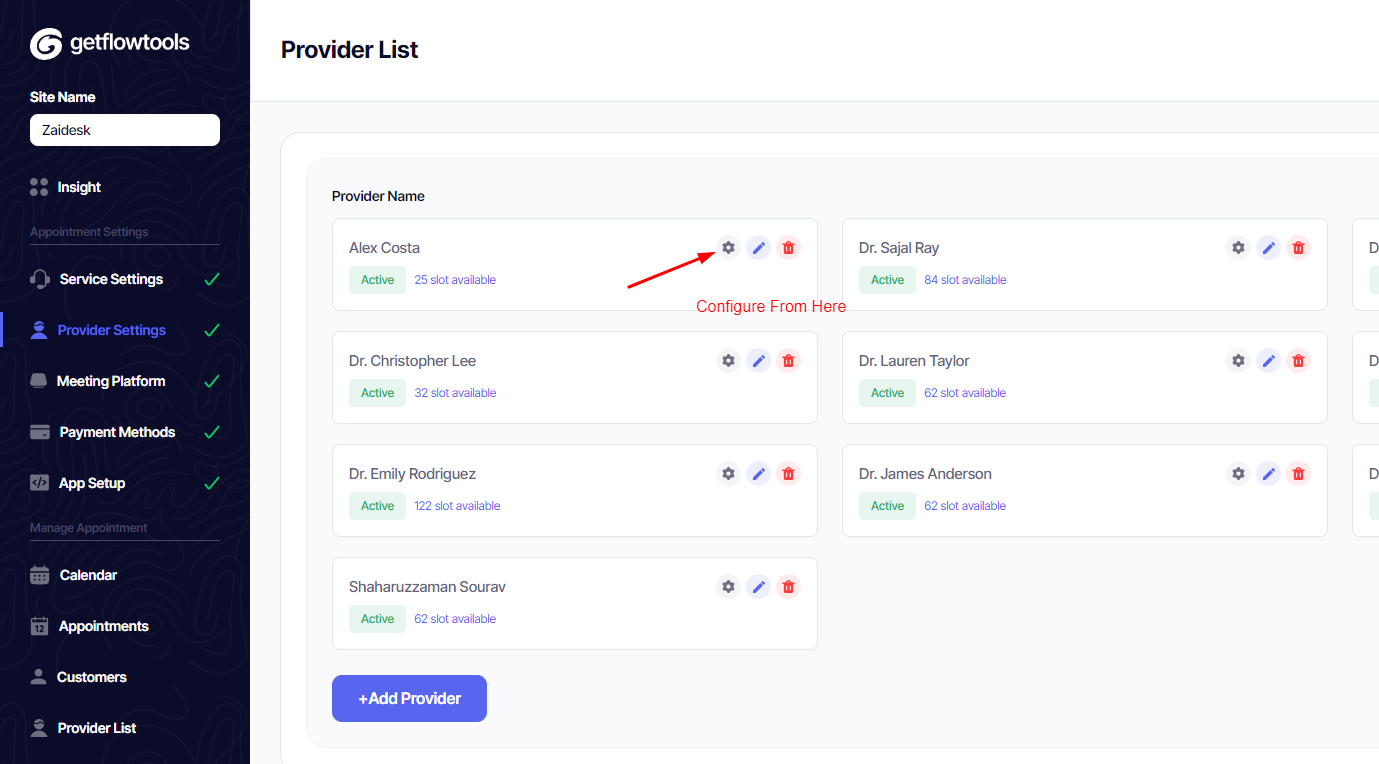
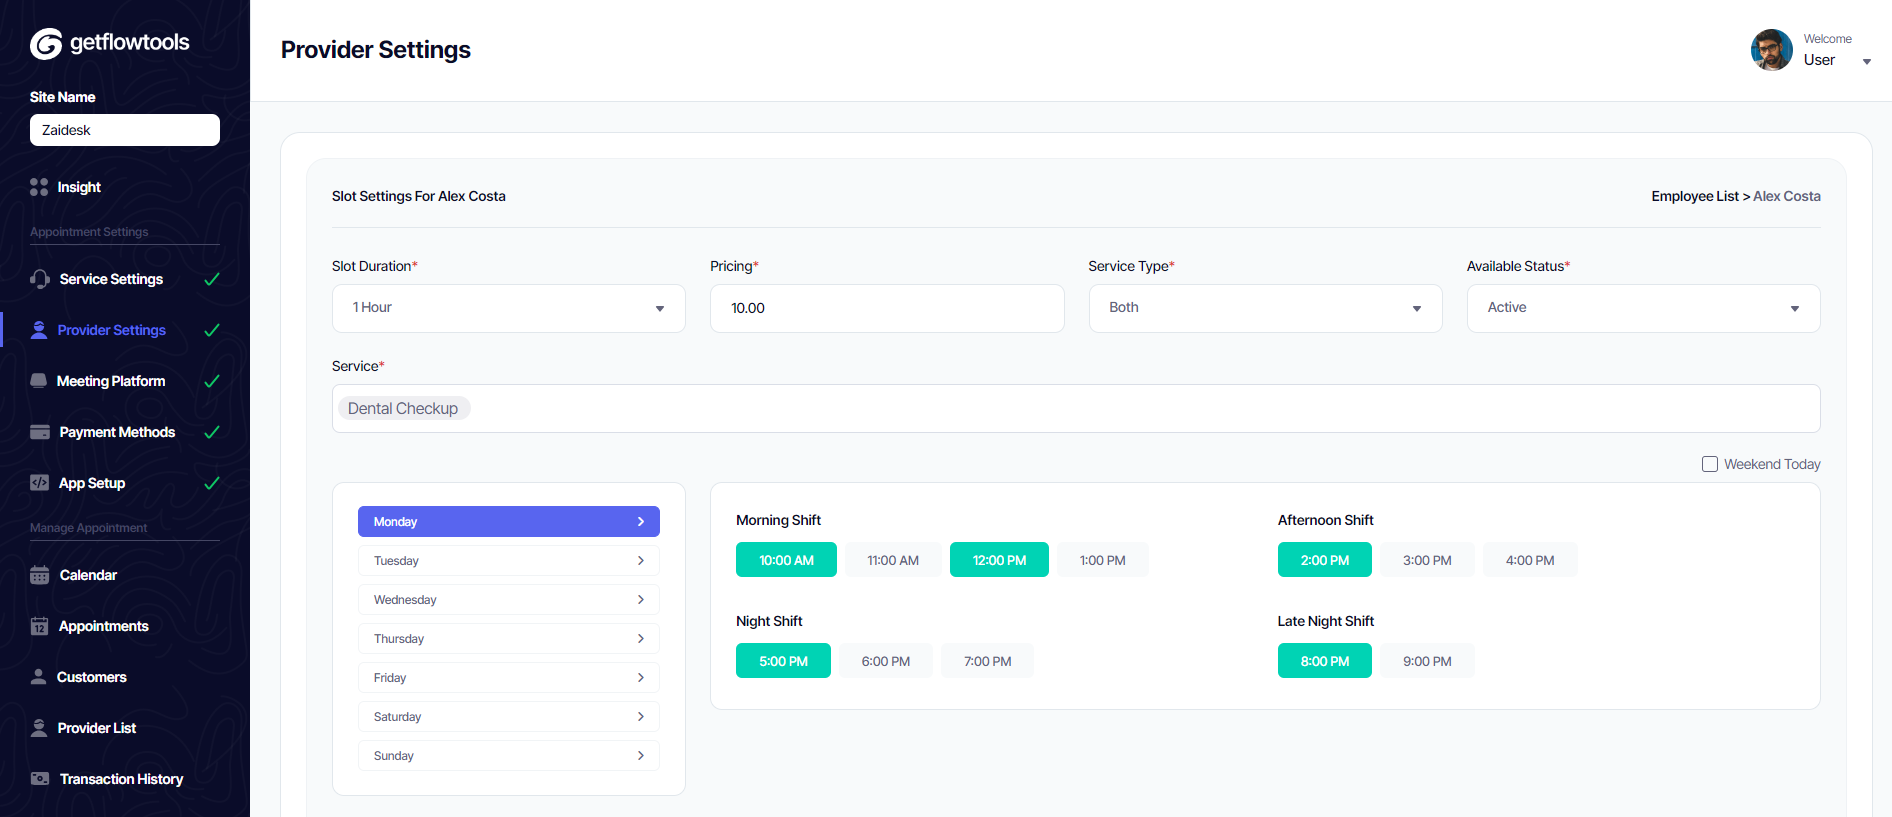
Add Service Providers
Integrate service providers into the system, setting their schedules, prices, and other essential details for a personalized touch.
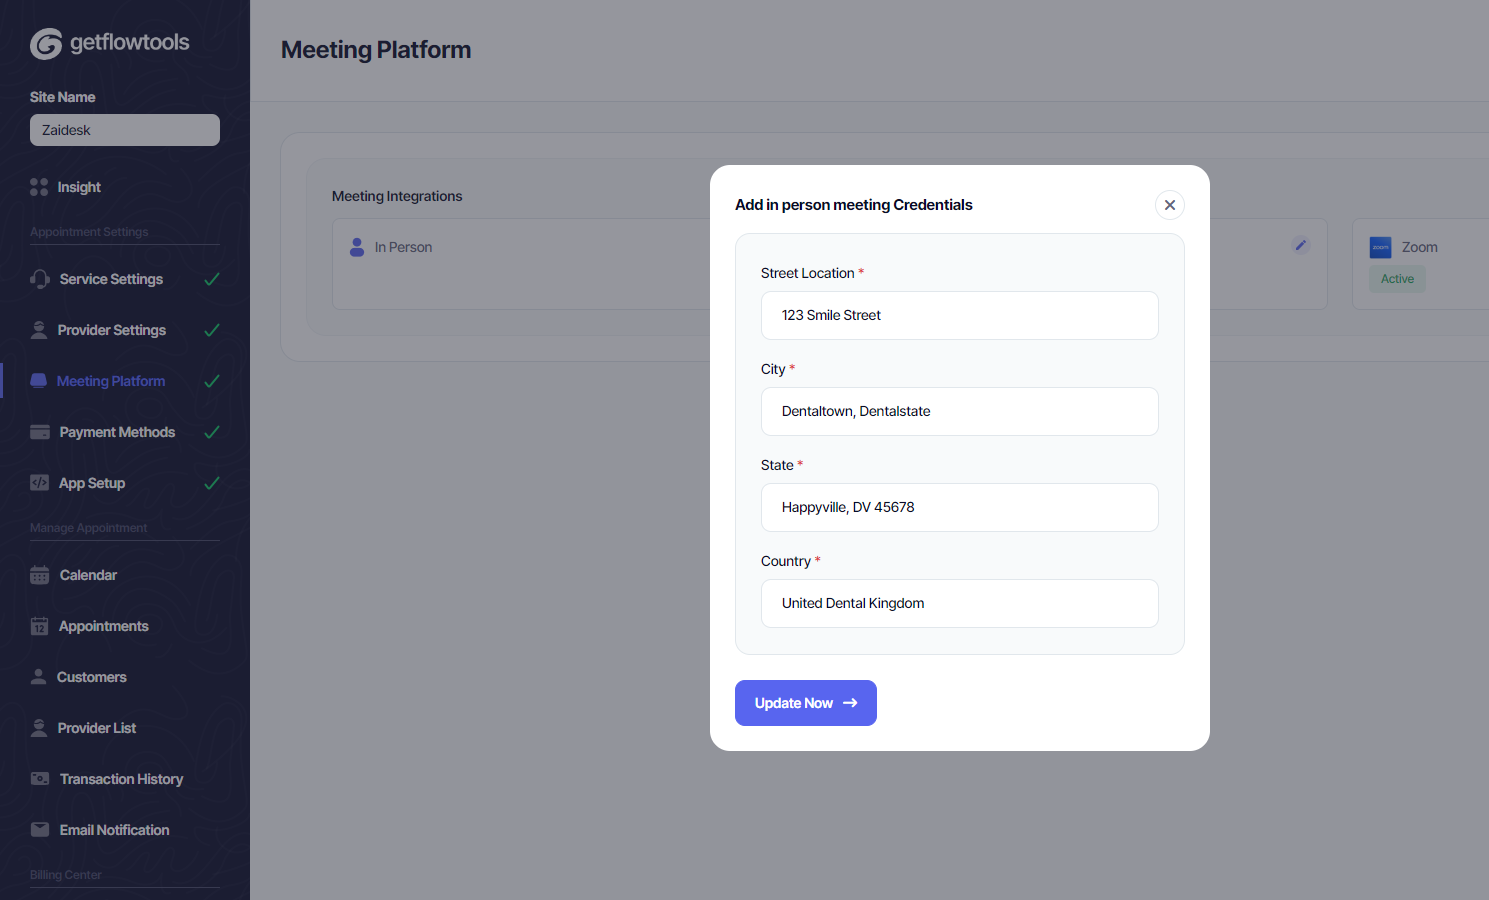
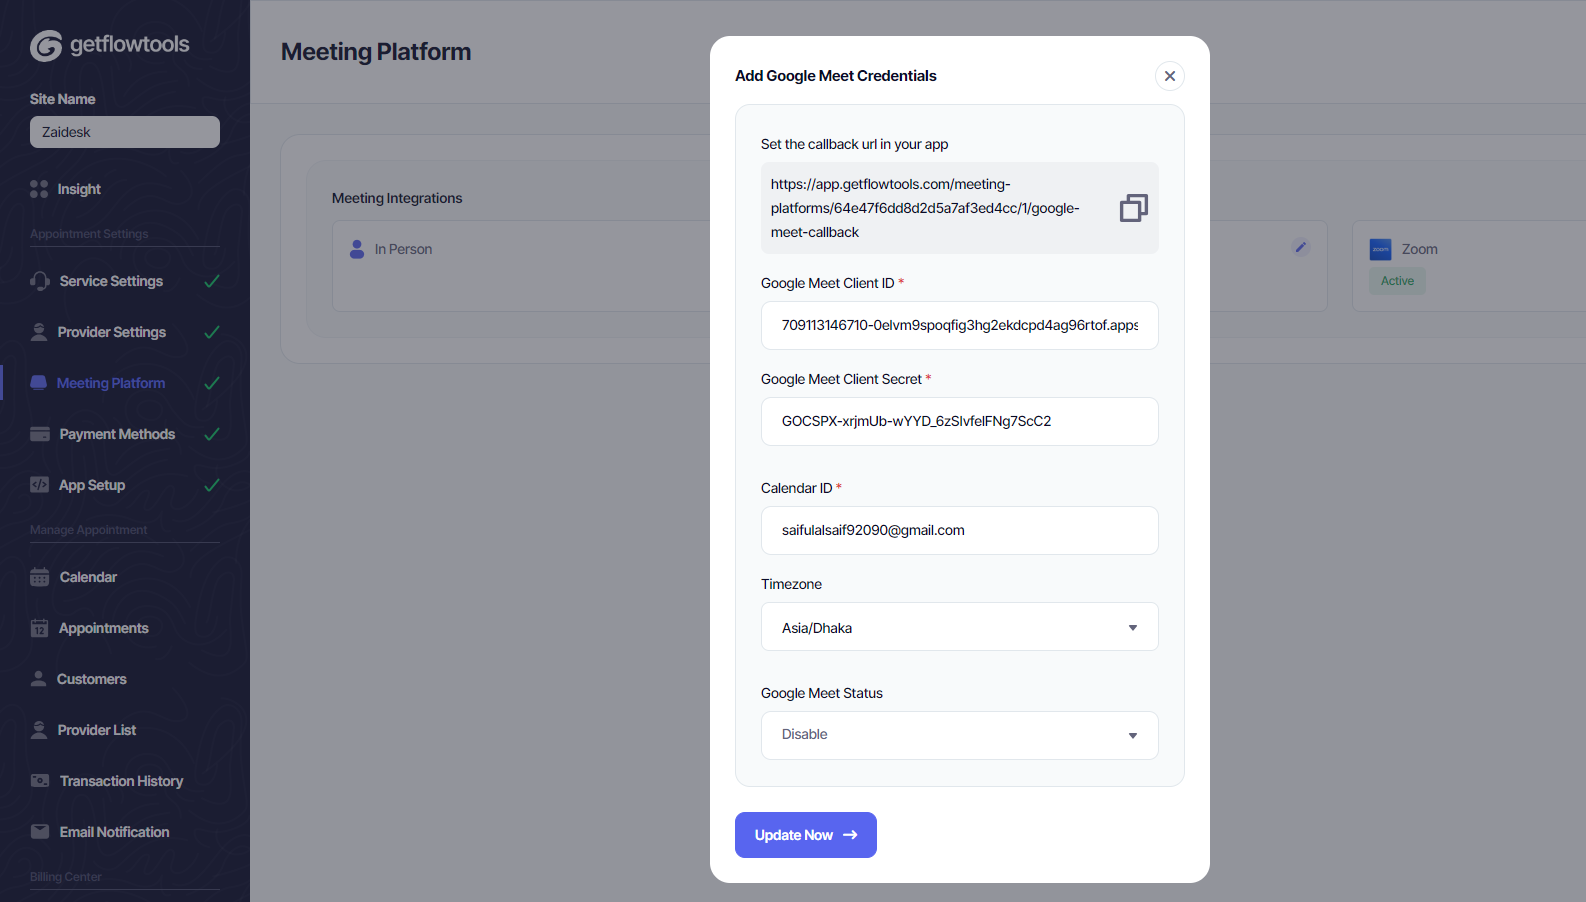
Configure Meeting Methods (Zoom, Google Meet, In Person)
Enhance user convenience by configuring meeting methods such as Zoom or Google Meet, ensuring seamless virtual interactions.
- In Person:
- Google Meet:
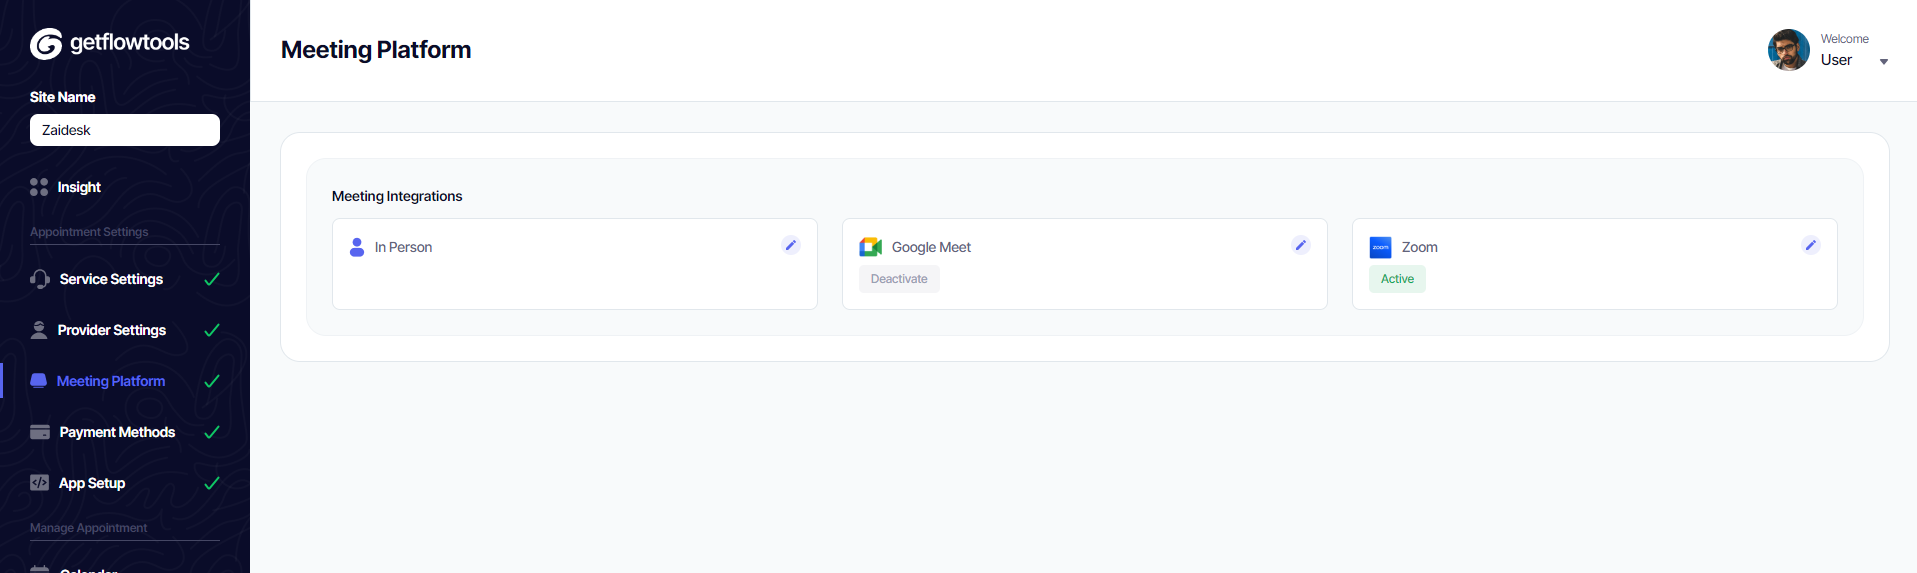
- Zoom:
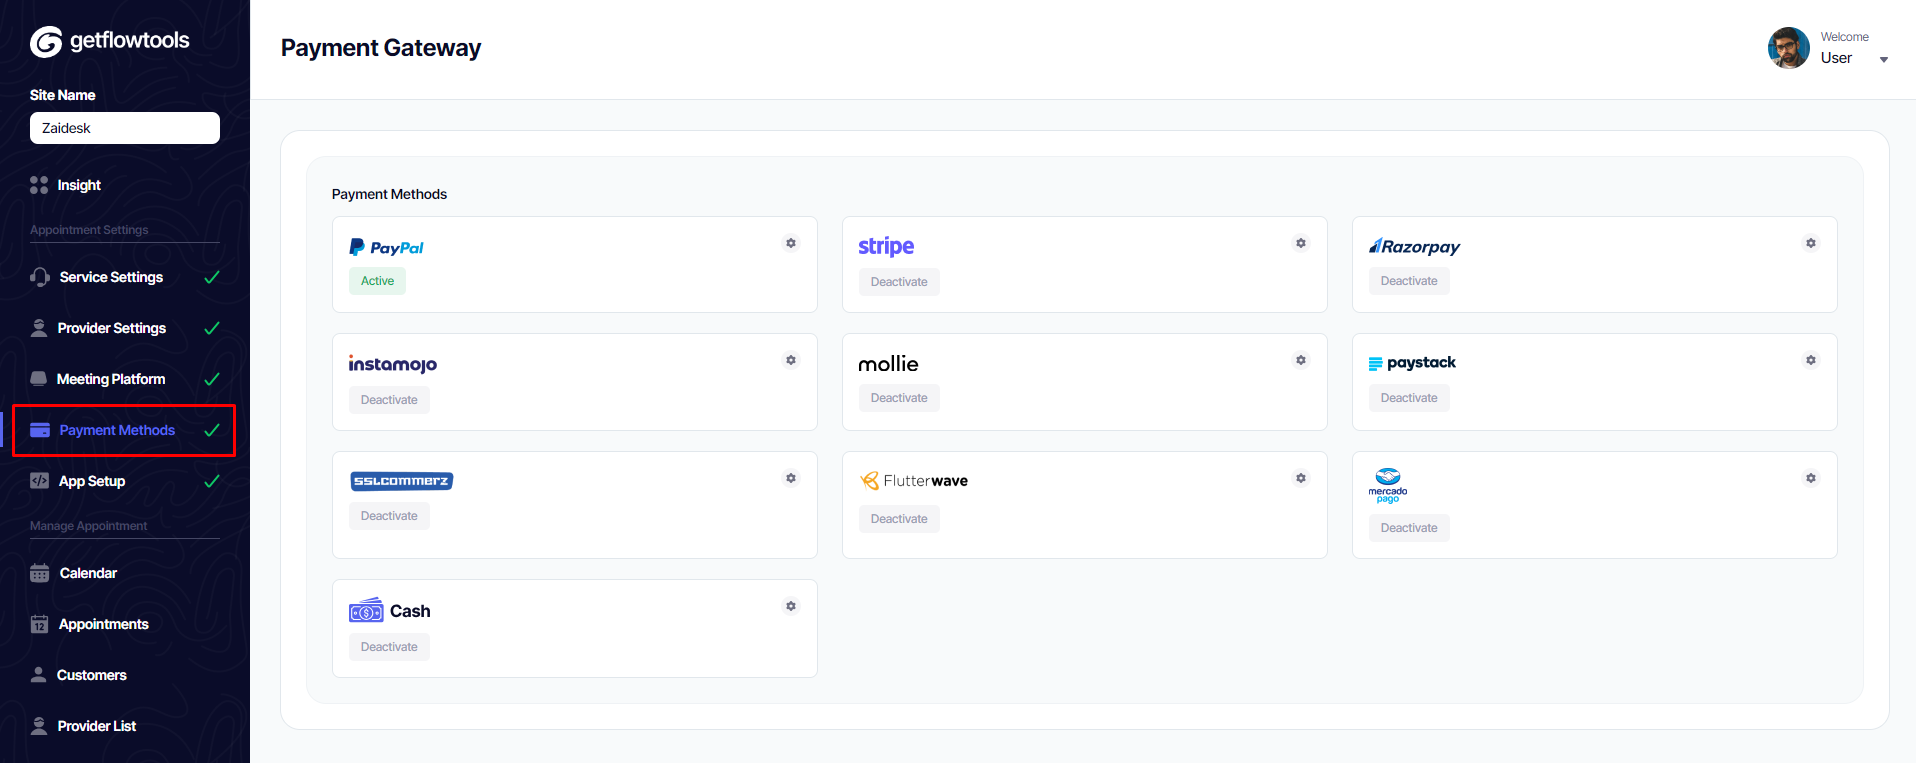
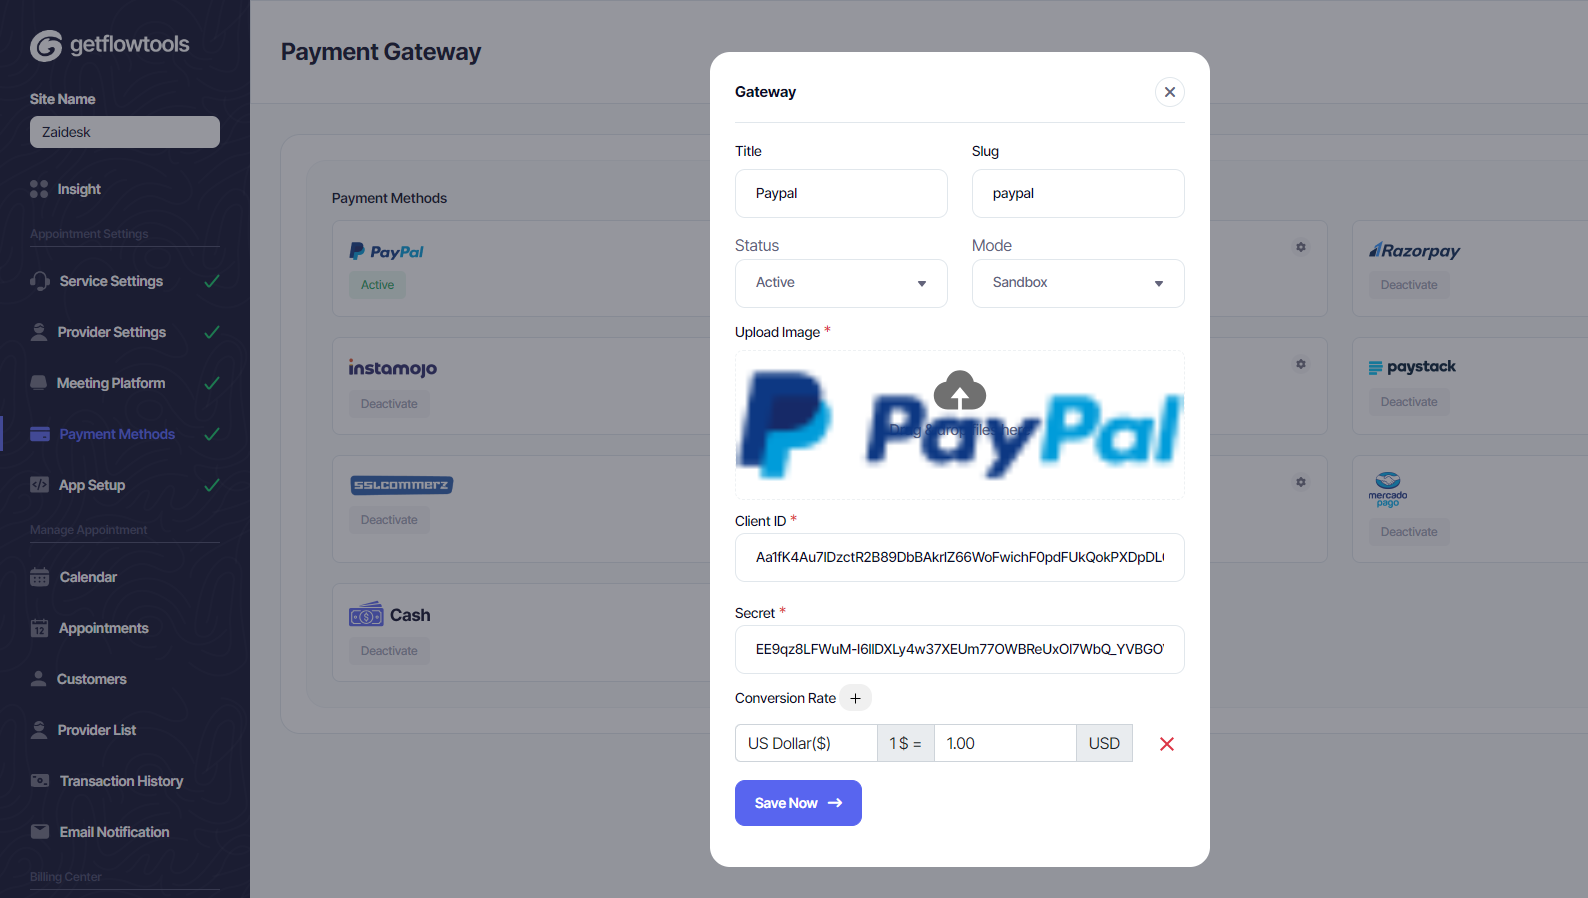
Configure Payment Gateway
Streamline transactions by configuring your preferred payment gateway, ensuring a secure and efficient payment process.
This step-by-step approach ensures a thorough setup, allowing you to provide a tailored and efficient booking experience for your users.
3. Configure the booking form in your Webflow site.
Once all the settings have been configured to your satisfaction, proceed to the next step: copying the embedded code. Follow these simple instructions to seamlessly integrate it into your Webflow website:
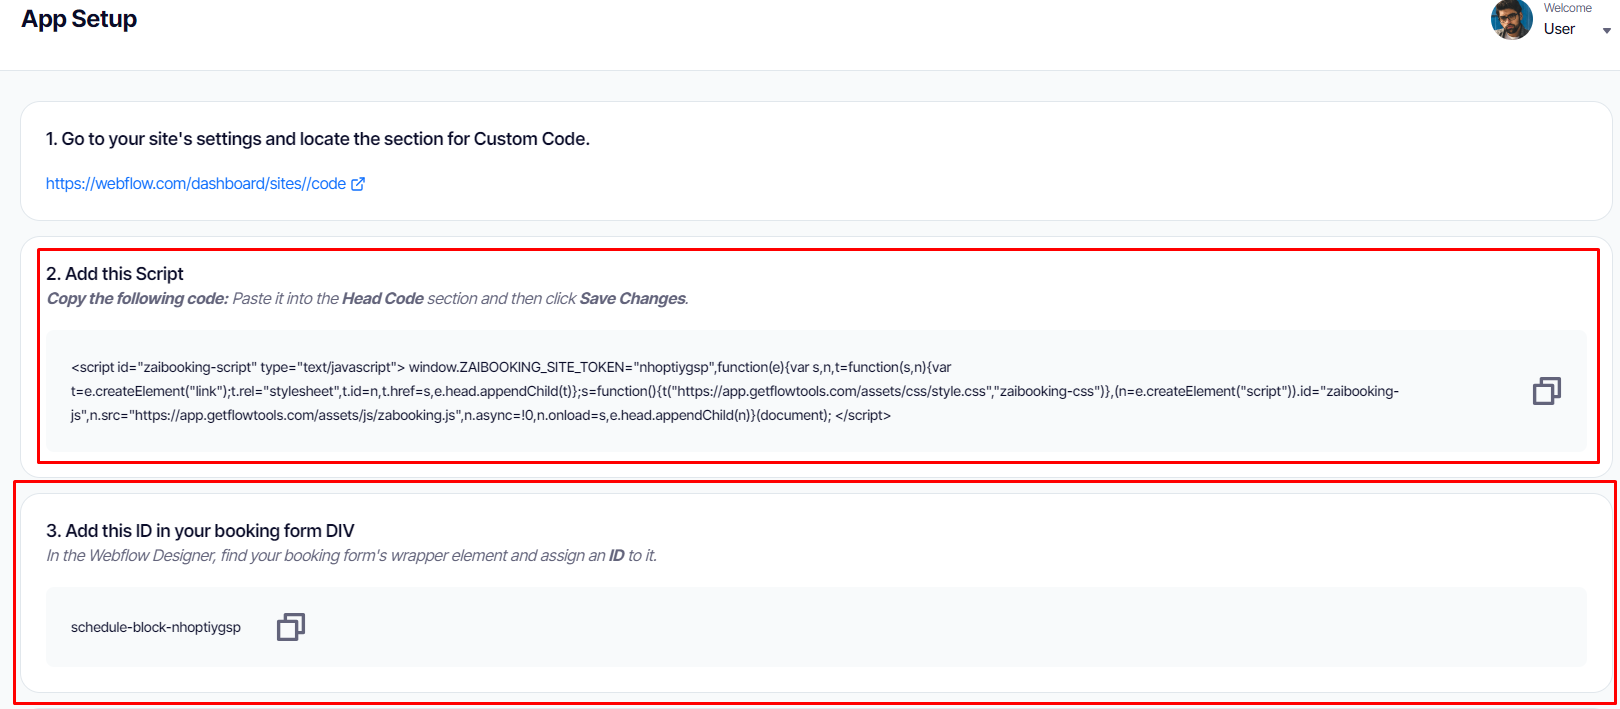
Add the embedded code to header section
- Copy the script code provided by GetFlowTools from the site settings section.
- Open your Webflow project.
- In the Webflow Designer, go to the top right and click on your project name.
- Select "Project Settings" from the dropdown menu.
- Inside the Project Settings, choose the "Custom Code" tab.
- Paste the GetFlowTools script into the "Head Code" section.
- Save the changes.
Add ID to Desired Page
- Copy the unique ID from the site setting page
- Navigate to the page in your Webflow project where you want to display the booking form.
- Add the unique ID provided by GetFlowTools to this section. This ID is crucial for identifying the specific form.
- Save the changes.
Publish the Site
- After adding the script and ID, go back to the main Webflow Designer.
- Click on the "Publish" button to publish the changes to your live site.
- Verify that the booking form appears correctly on the designated page.
By following these steps, users will be able to seamlessly integrate GetFlowTools into their Webflow site and showcase the booking form on the desired page.
Start To Get Online Booking