Webflow app configurable
Google meet Configuration
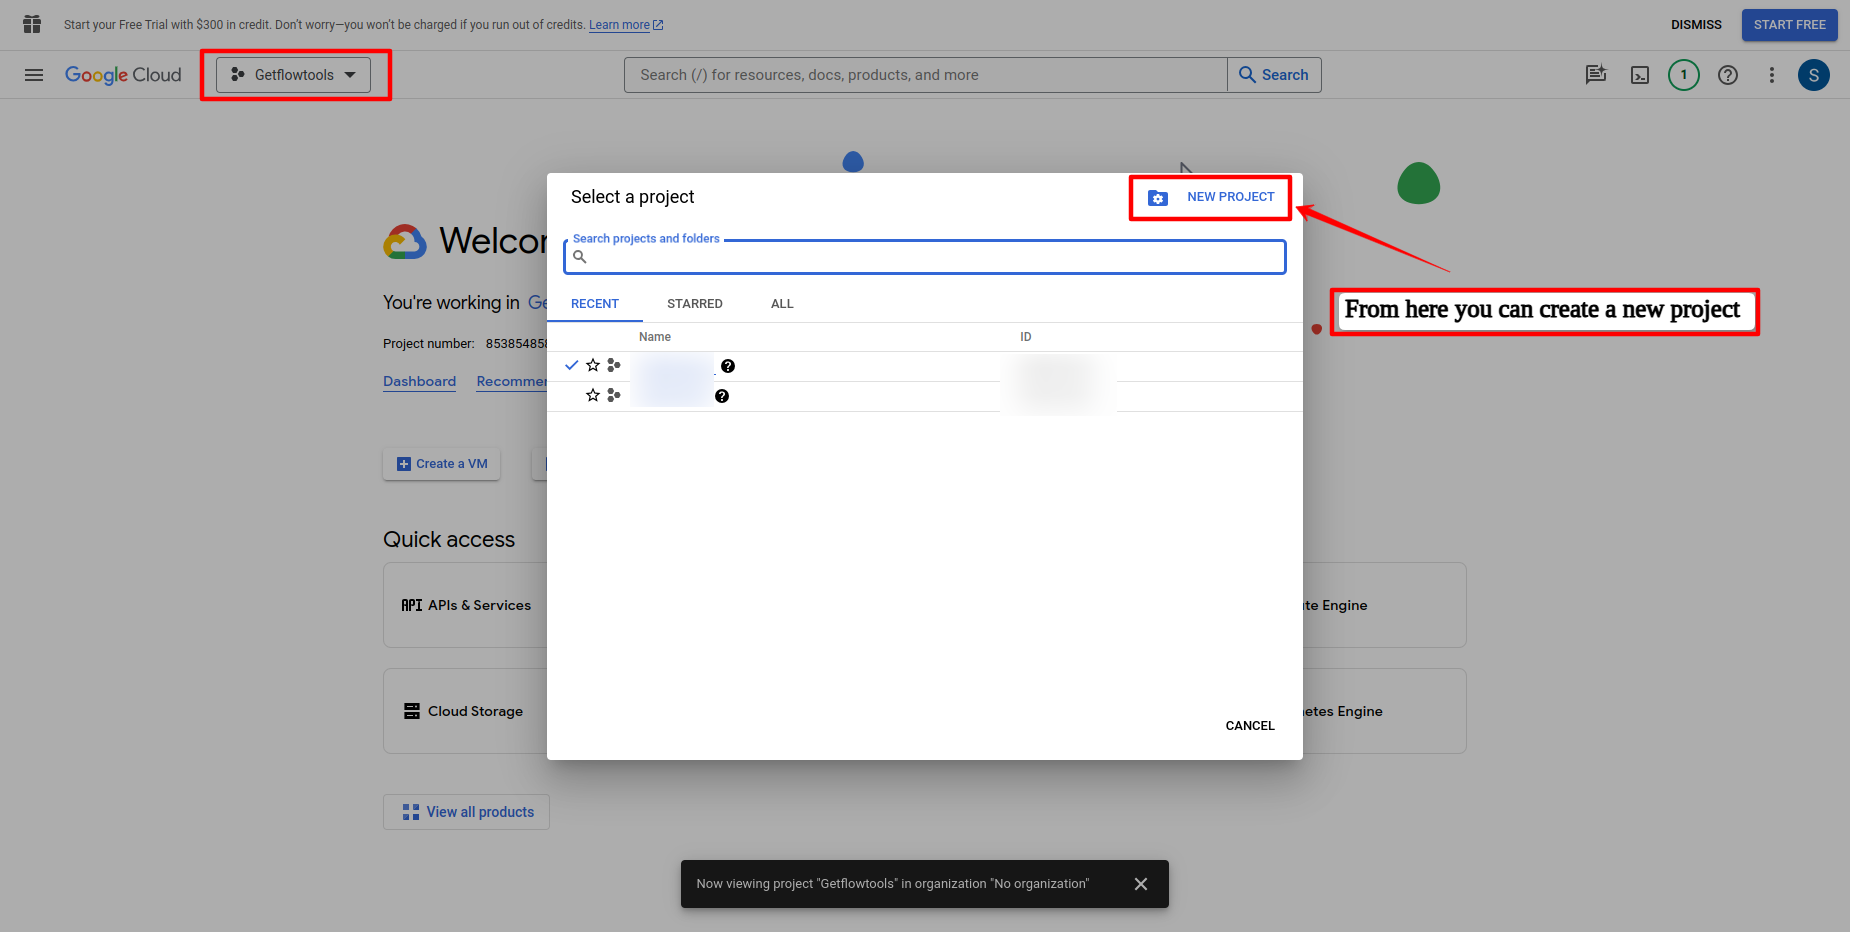
Create a Project on Google Cloud Console:
Step:1
- Go to the
Google Cloud Console, sing up and create new project ... !
https://console.cloud.google.com
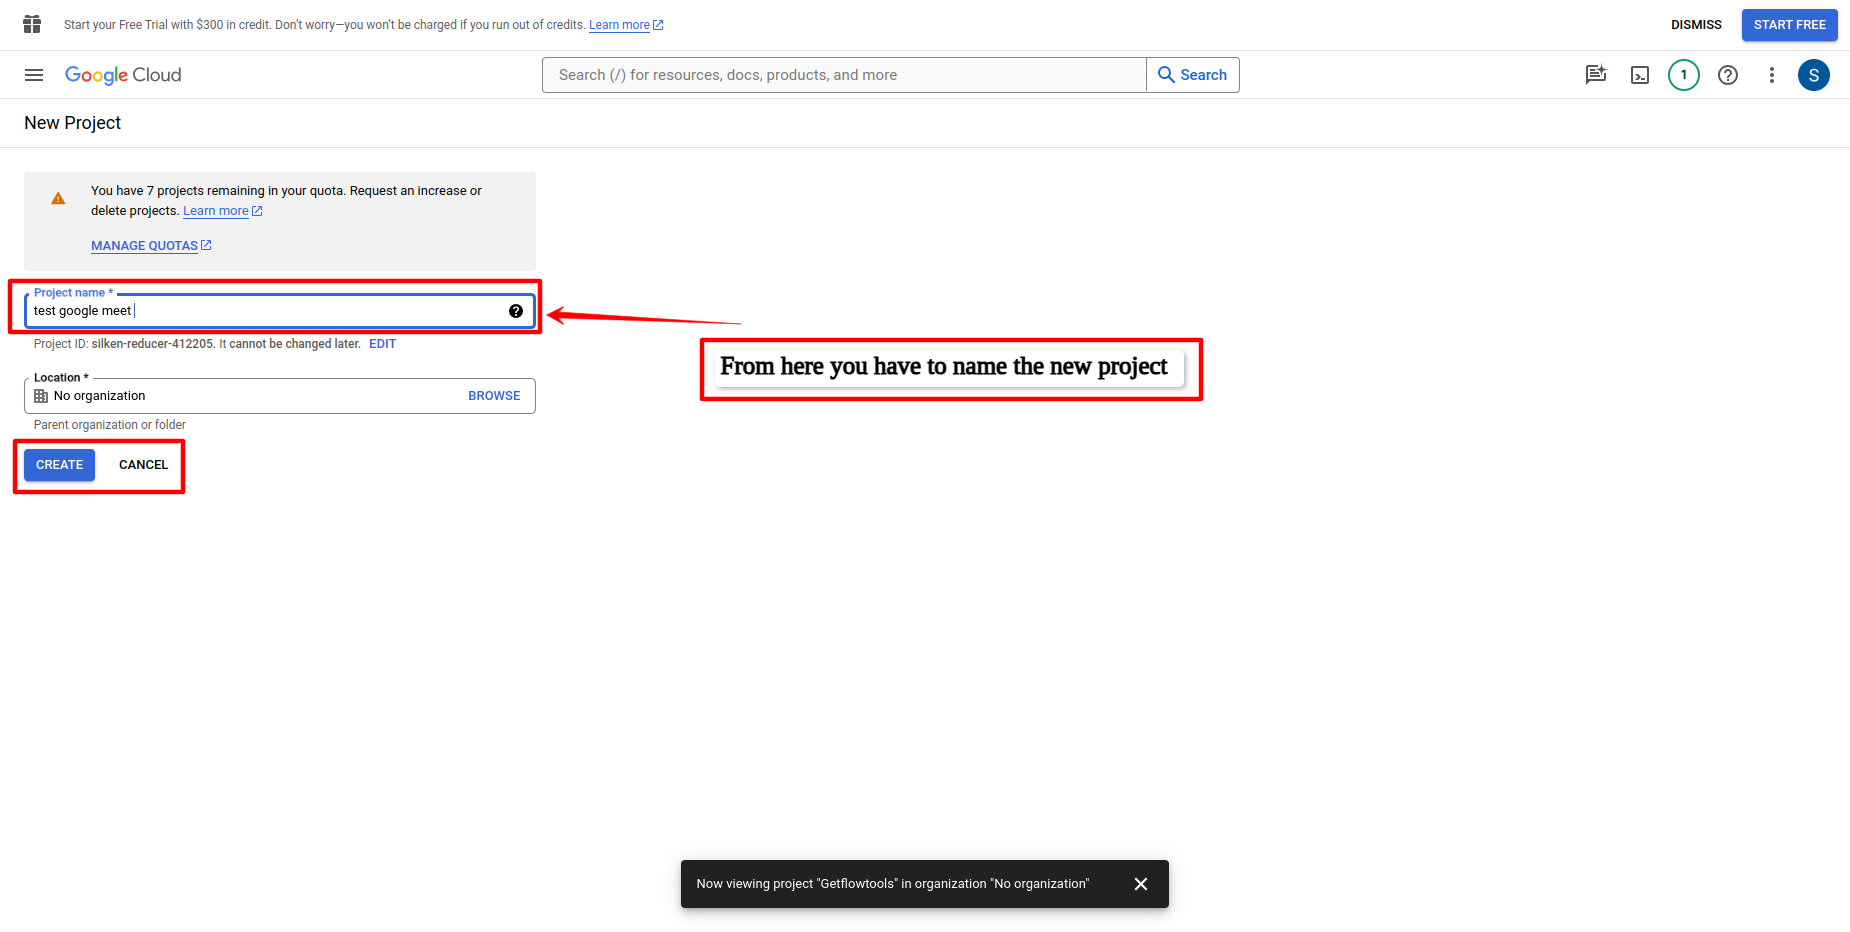
Step:2
- Give me a project
name and createa new project ... !
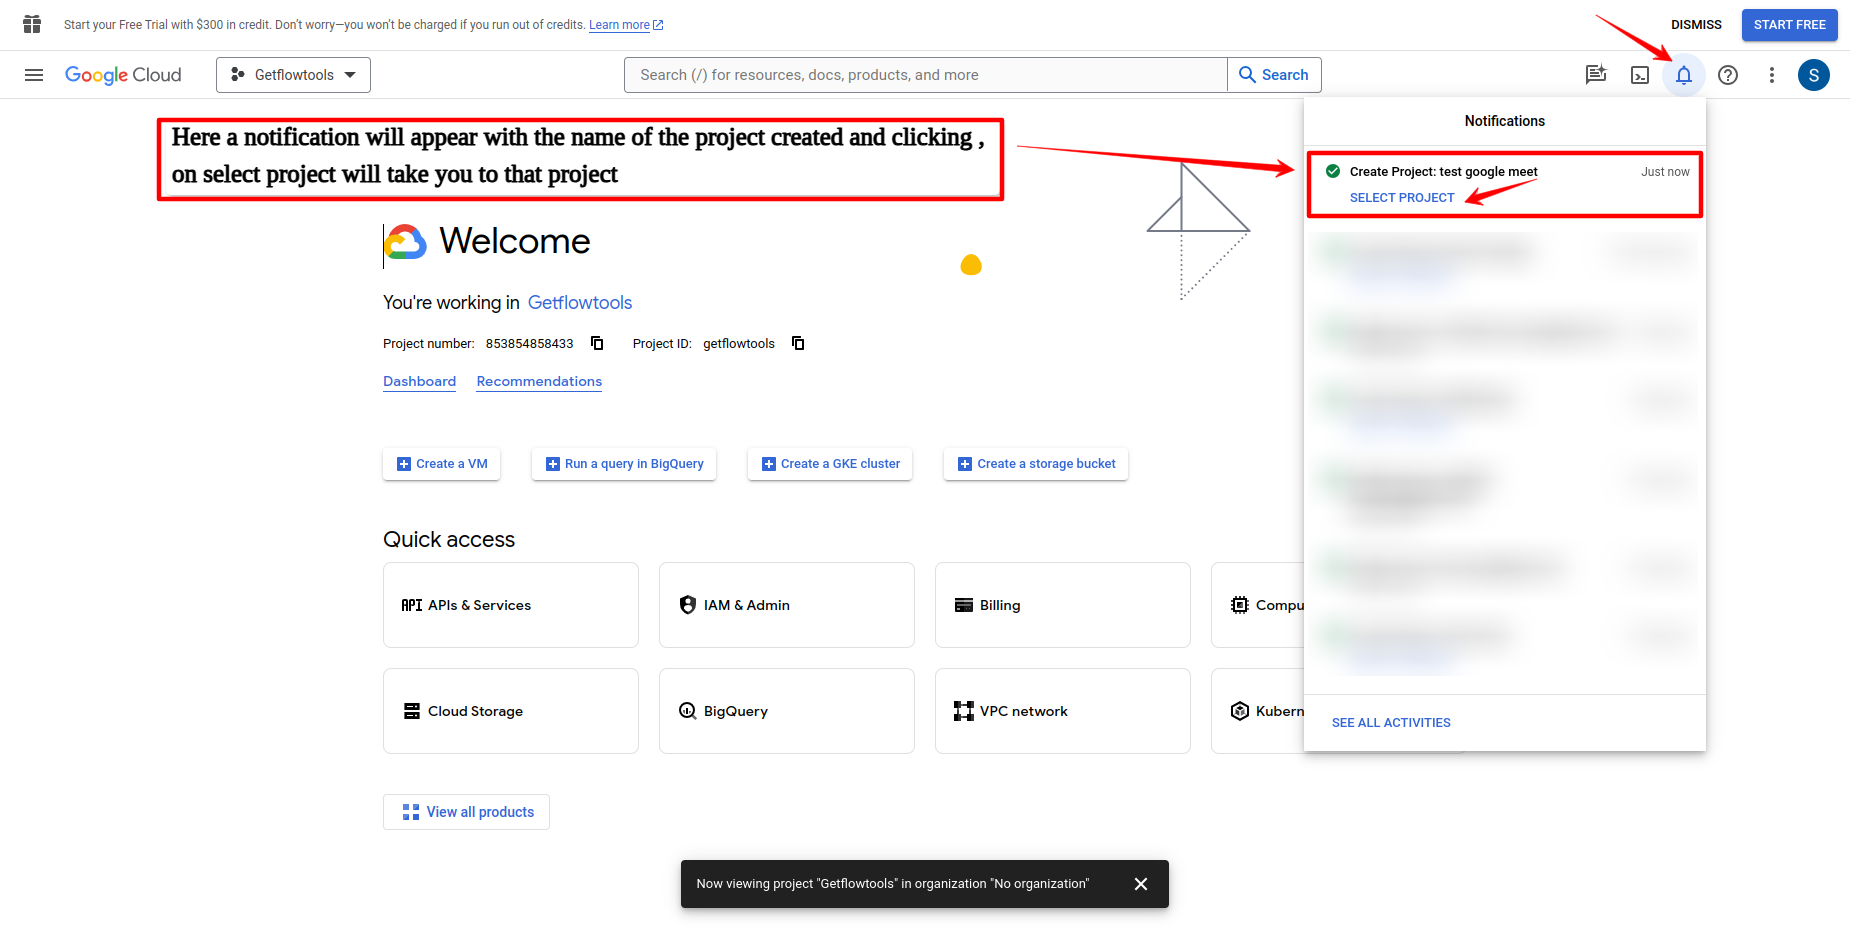
Step:3
- Here a notification will appear with the name of the project created and clicking , on select project will take you to that project ... !
Step:4
- Go to this 3 dot and go this menuber
APIs & ServicesandLibrary... !

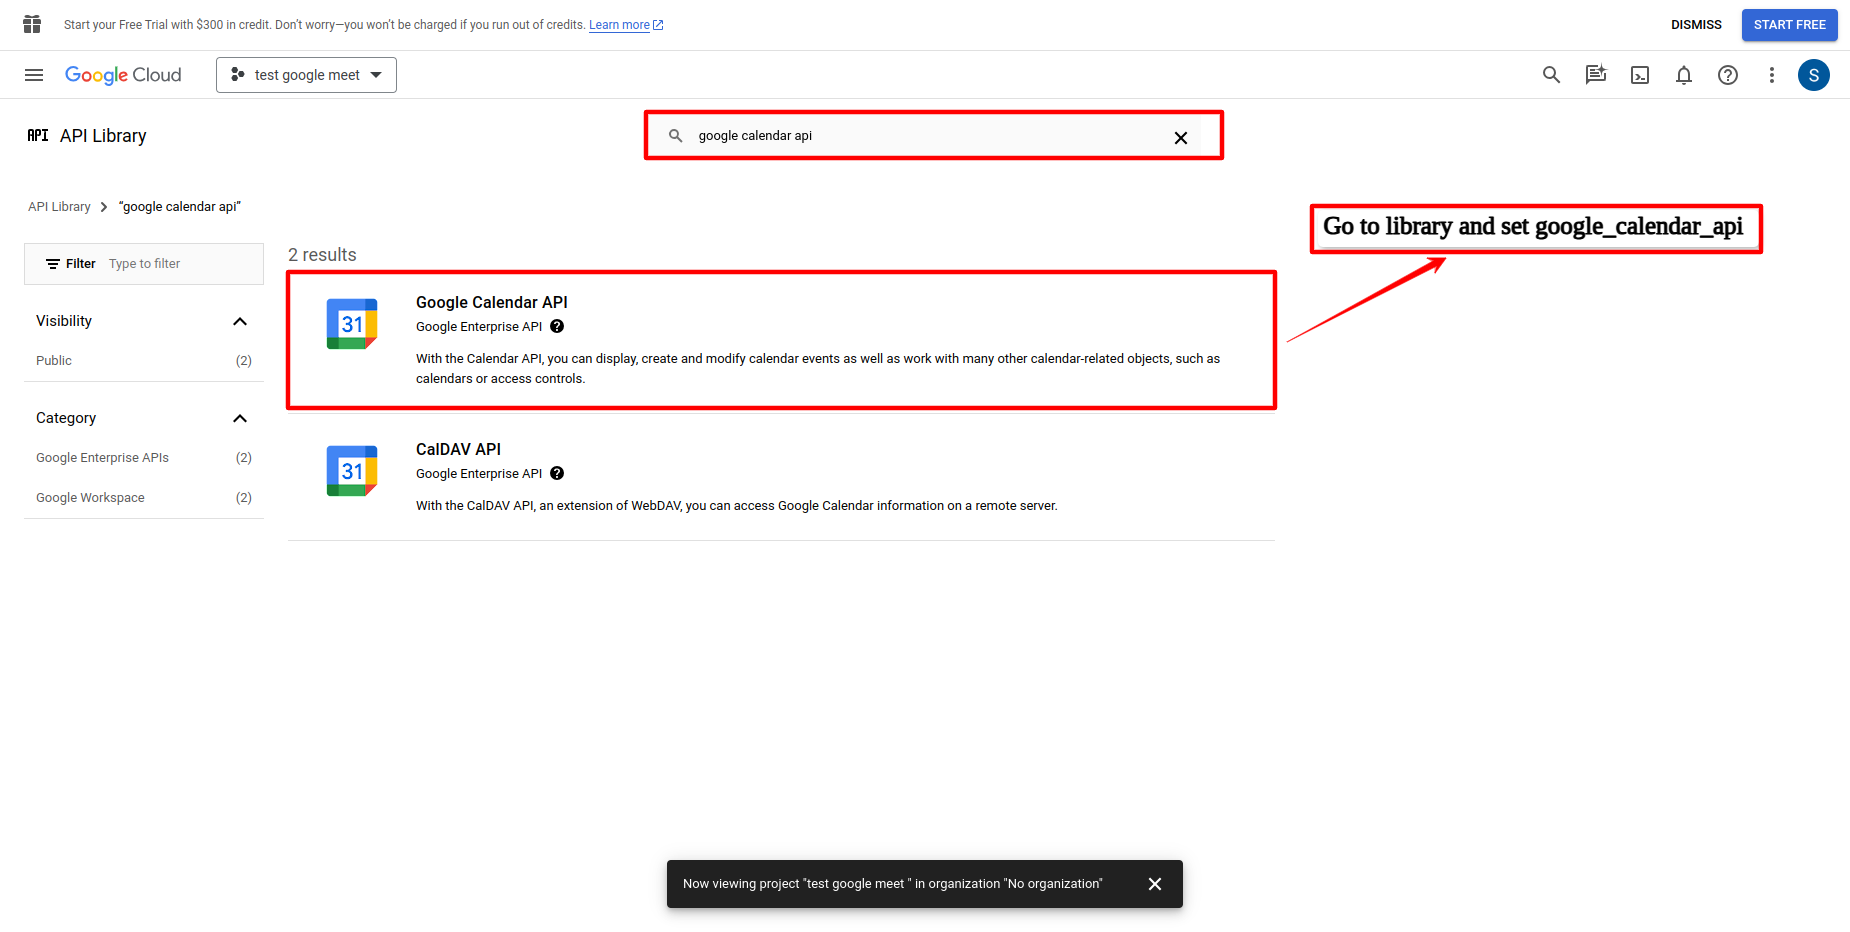
Step:5
- Search
Google Calendar Apiand click here ... !
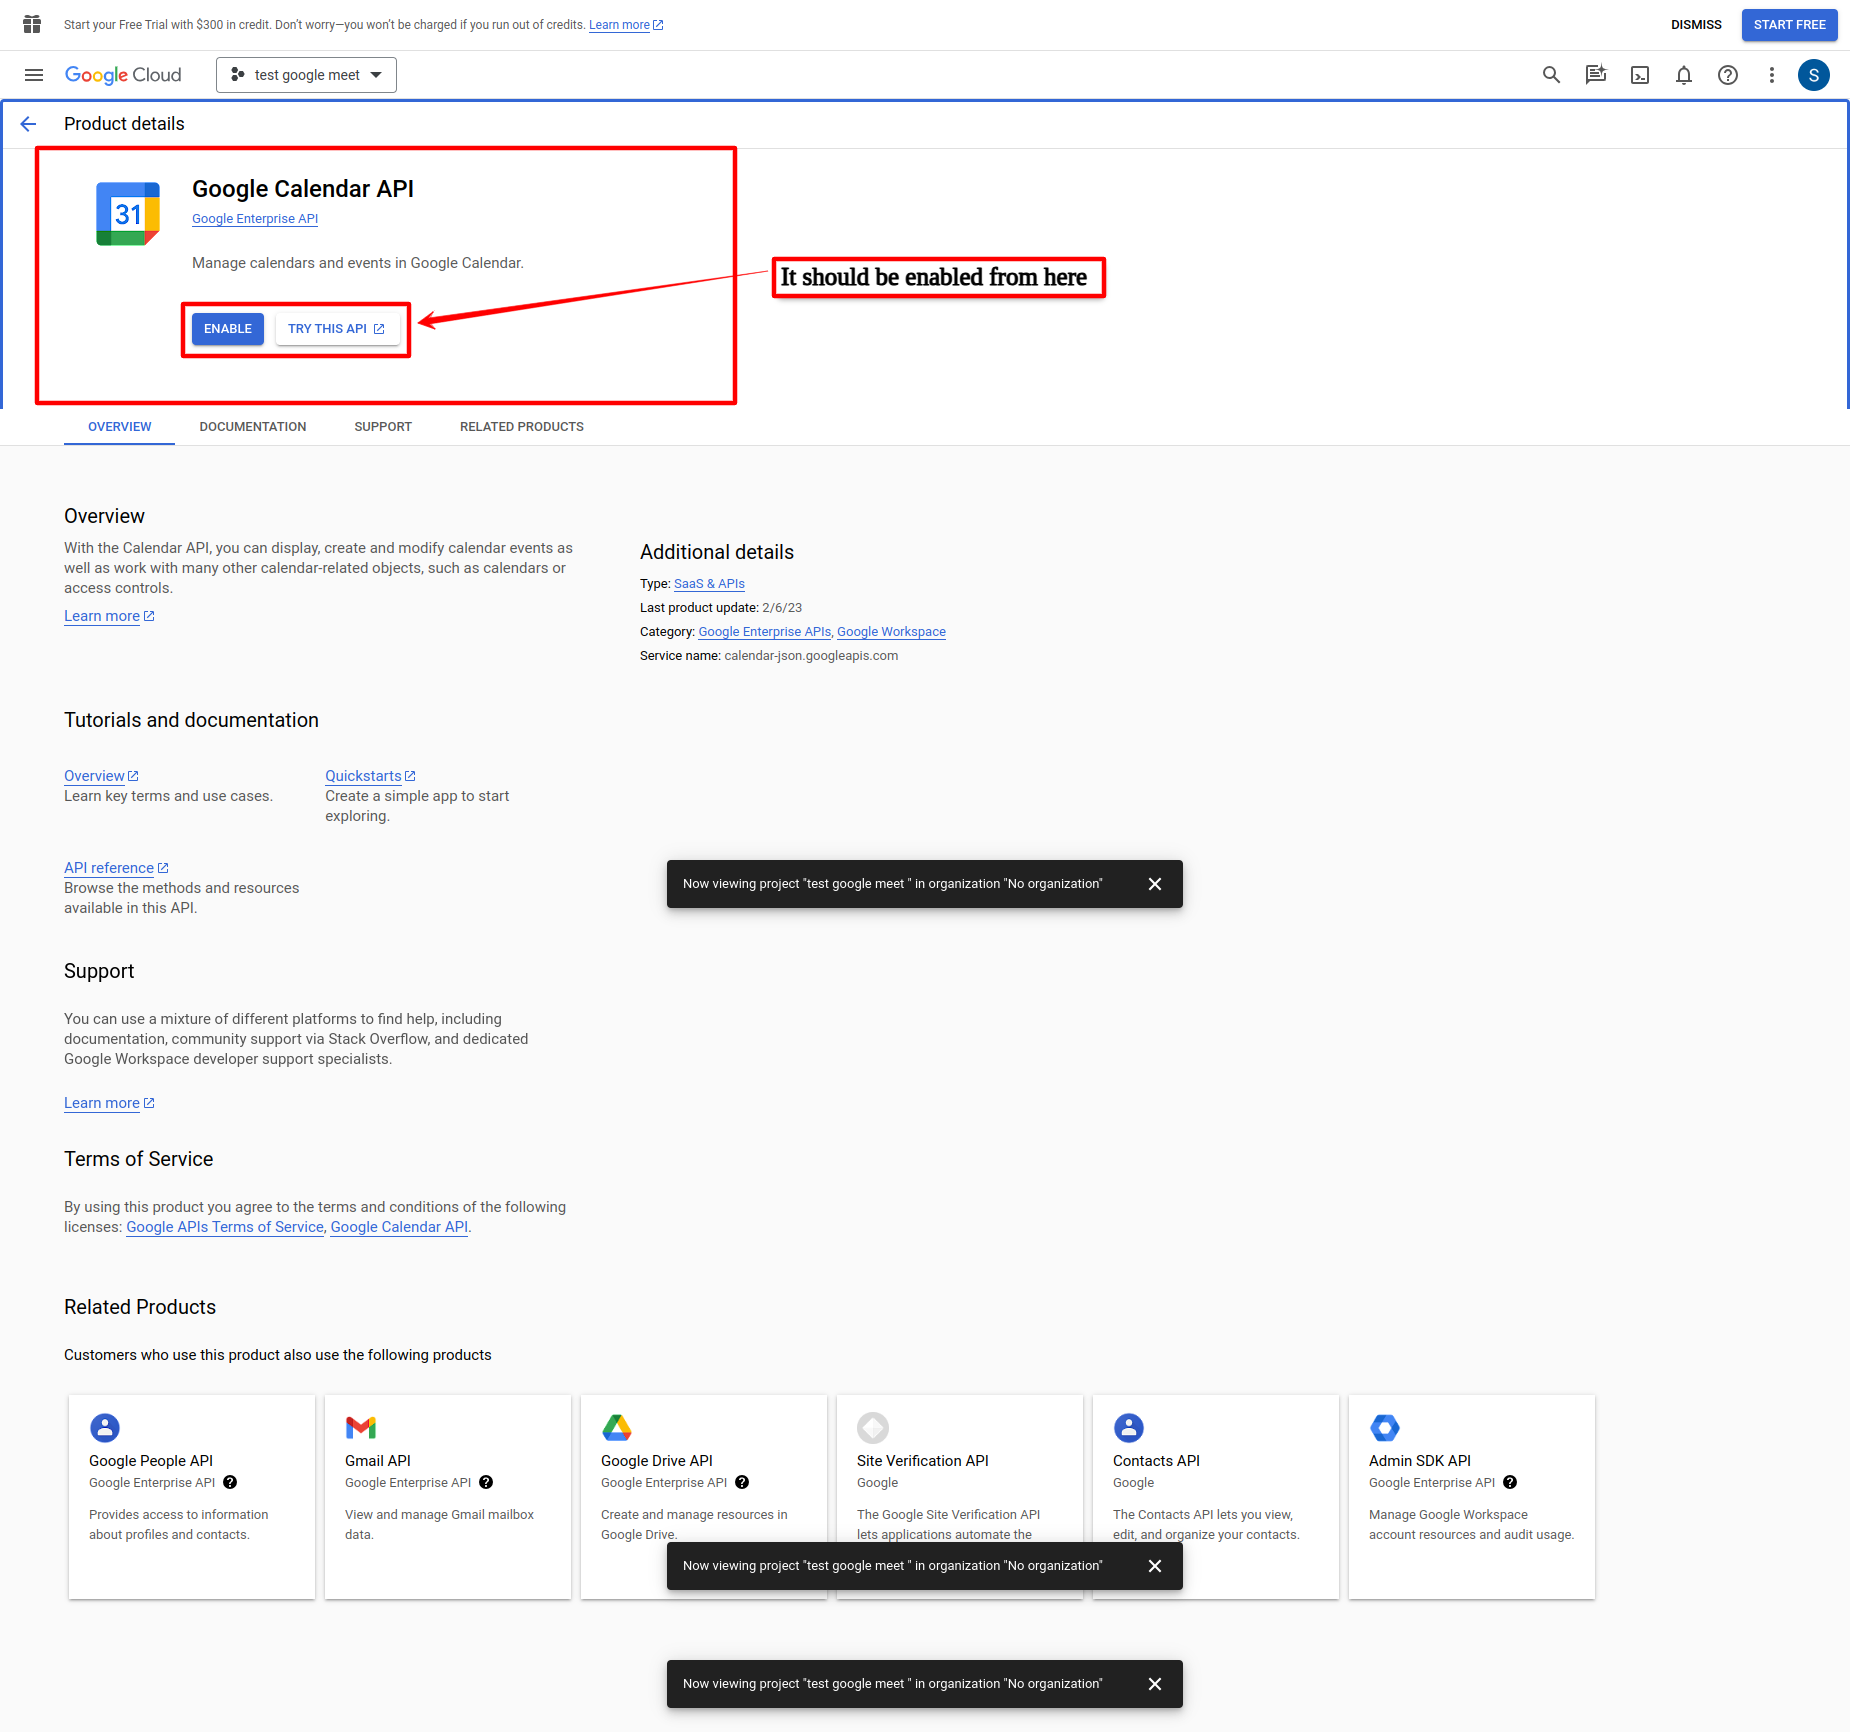
Step:6
- It should be
enabledfrom here ... !
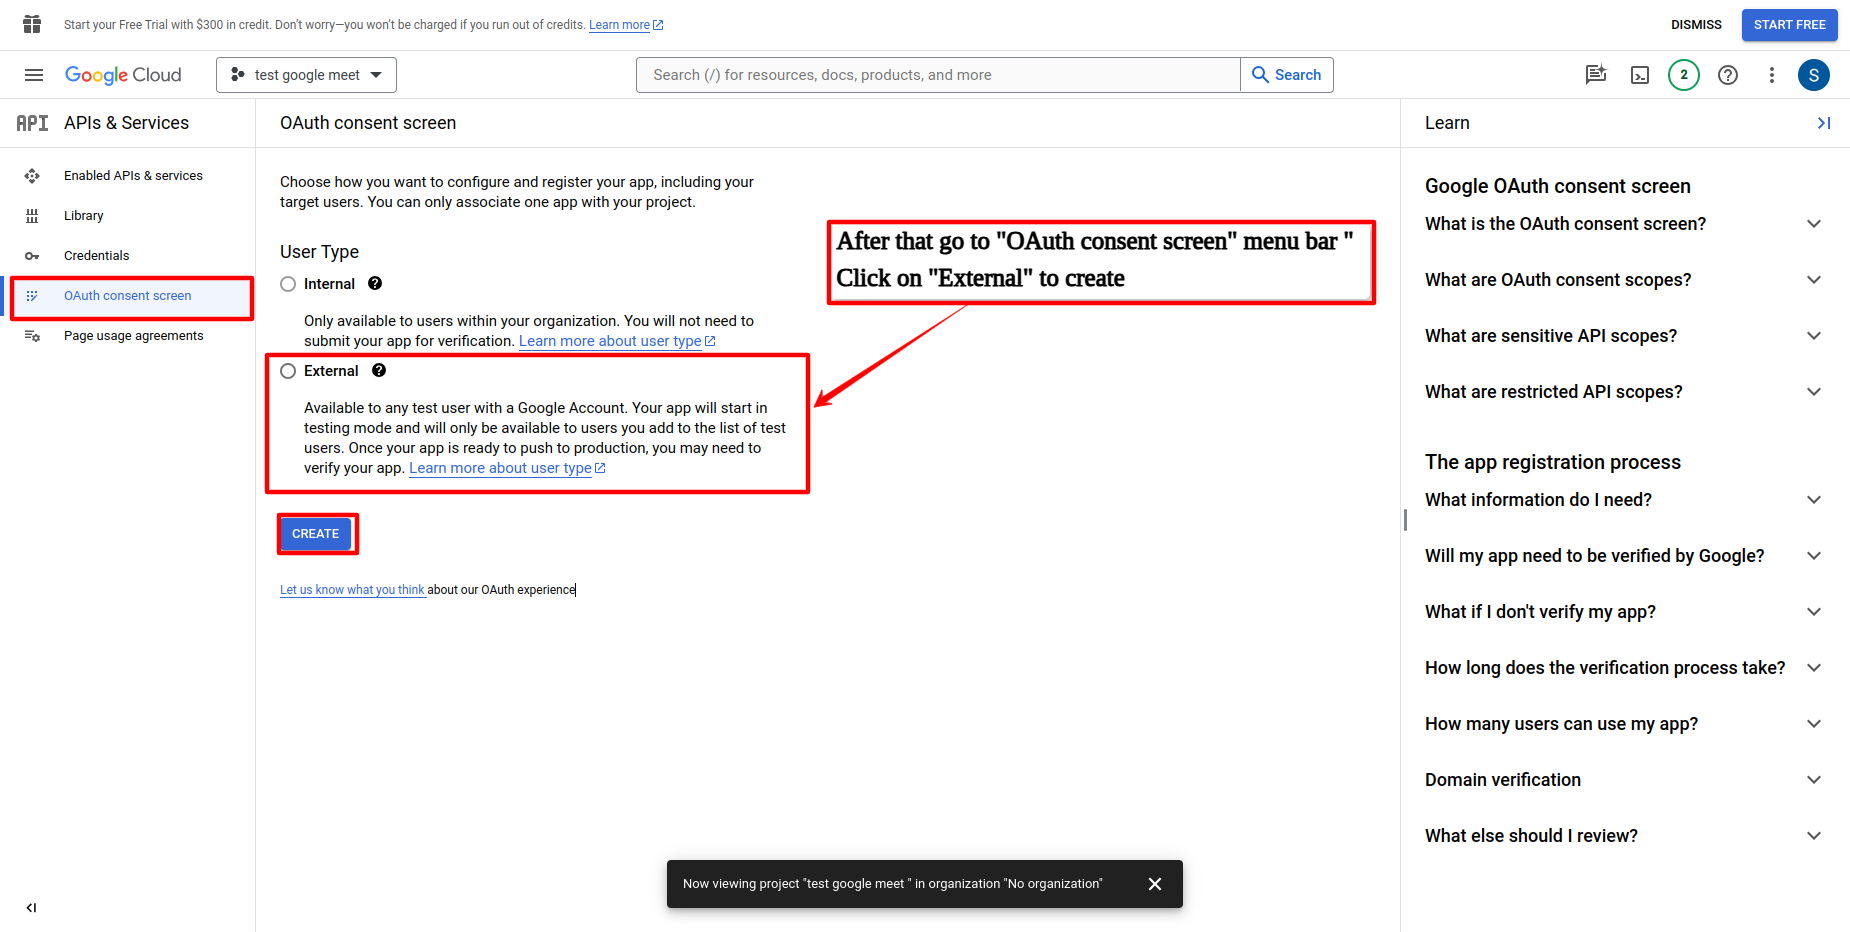
Step:7
- After that go to
OAuth consent screenmenu bar click onExternalto create ... !
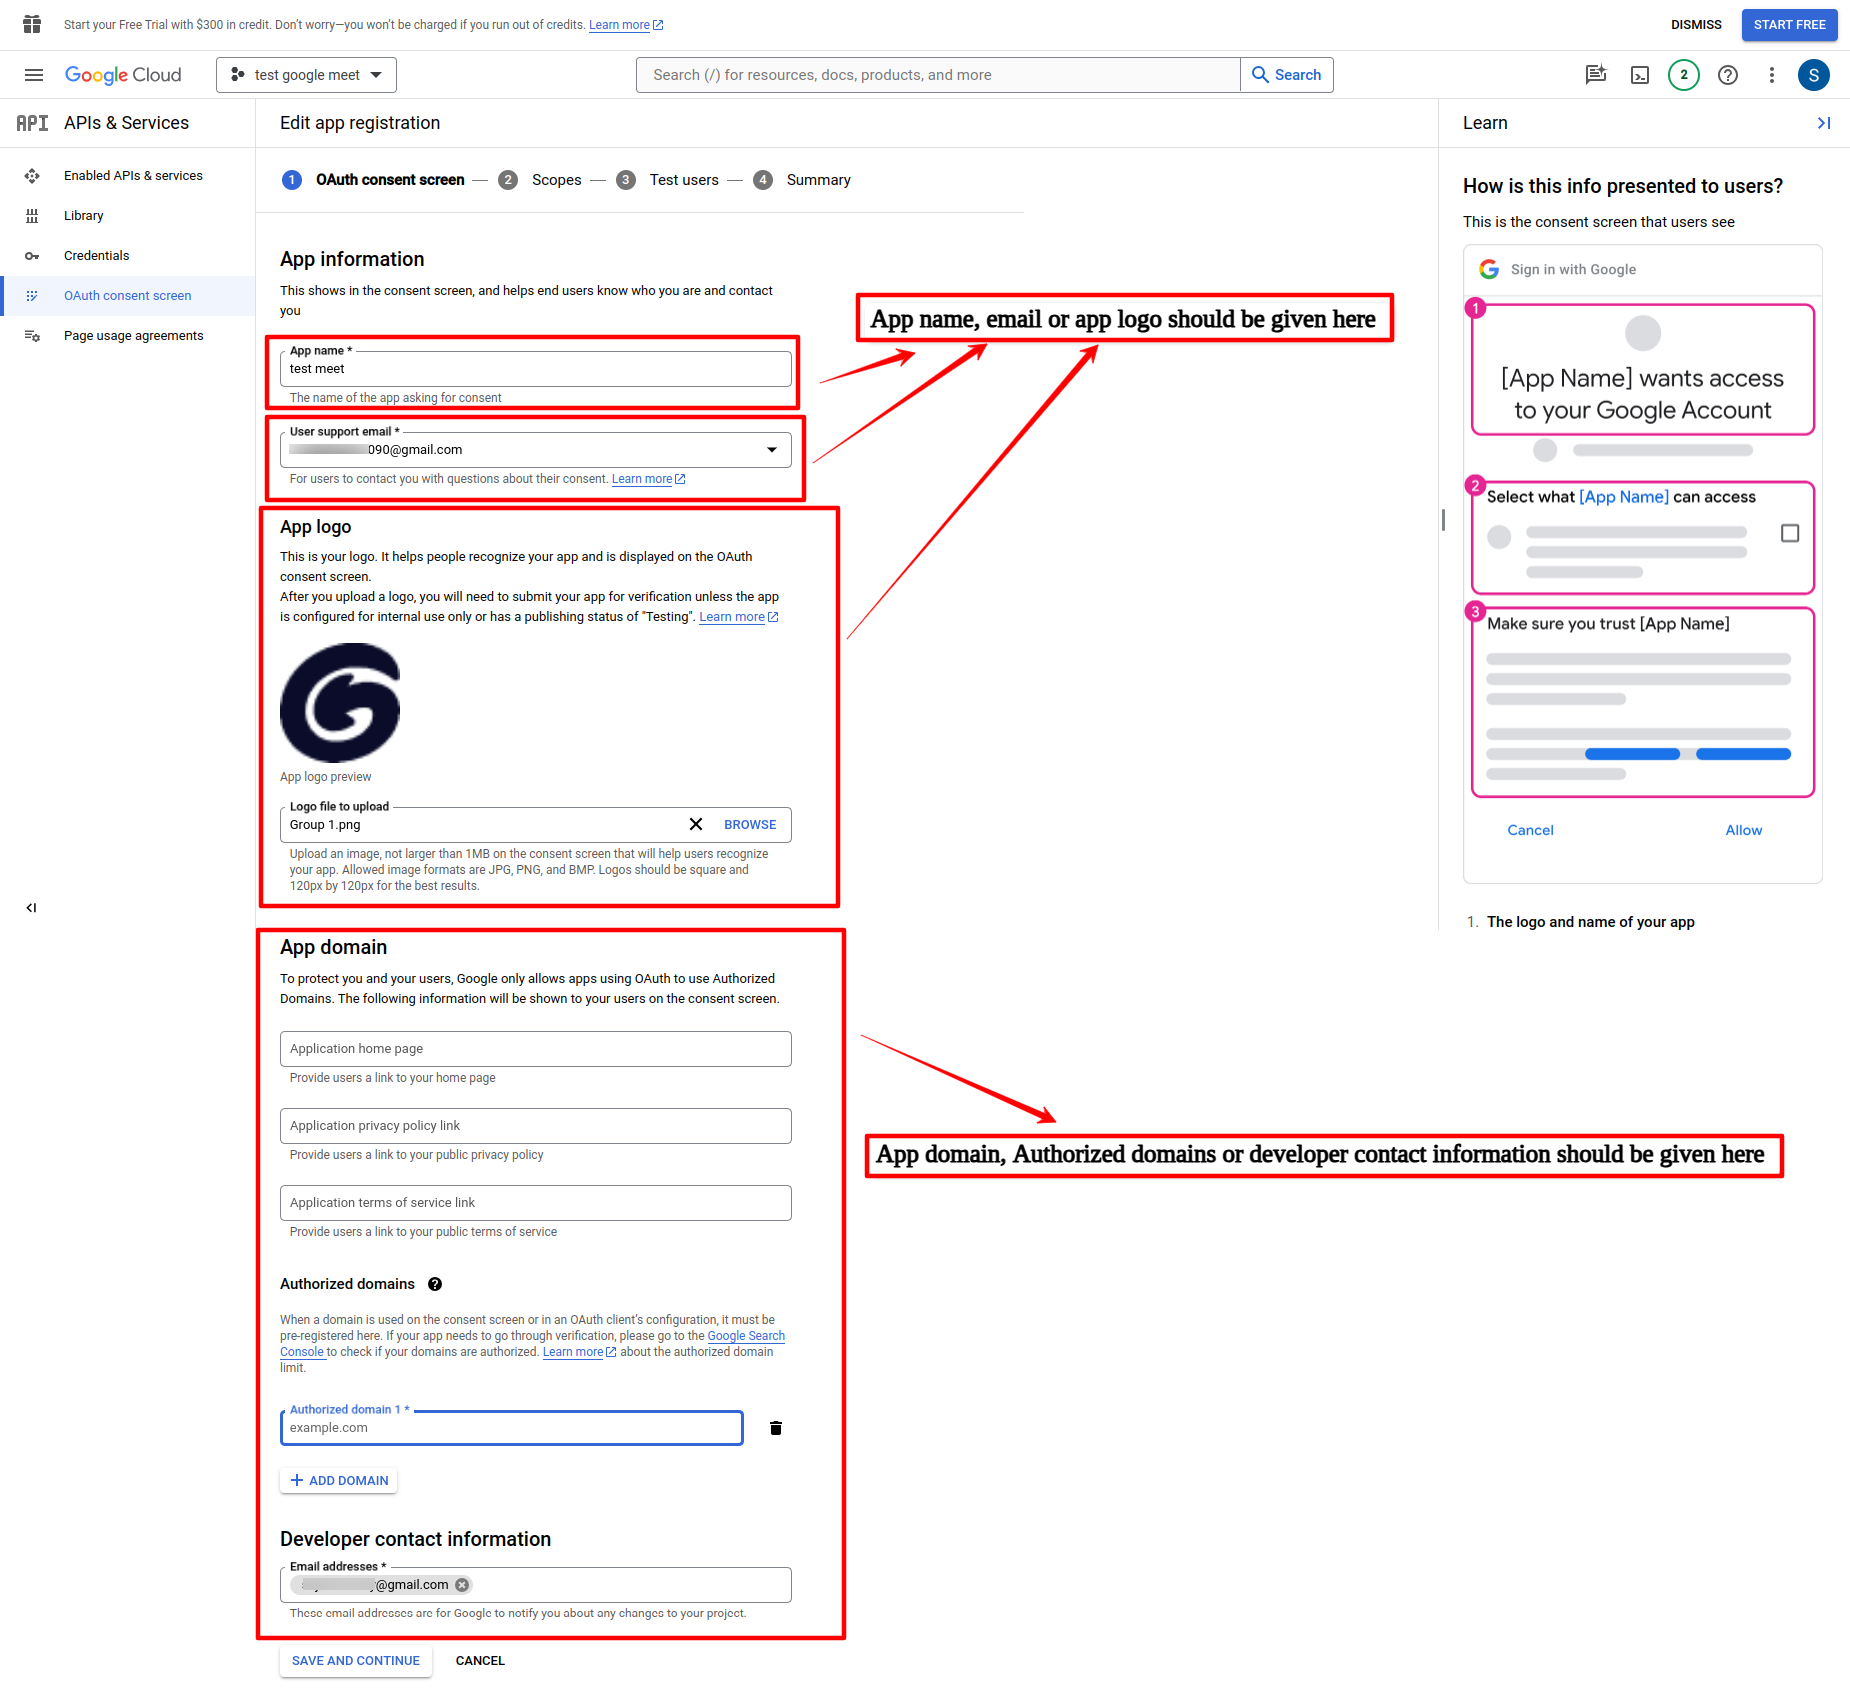
Step:8
- User can
App name,Email,App logo,App domain,Authorized domains or developer contact informationshould be given here ... !
Step:9
- User can
OAuth Consent Screencomplate step by step ... !

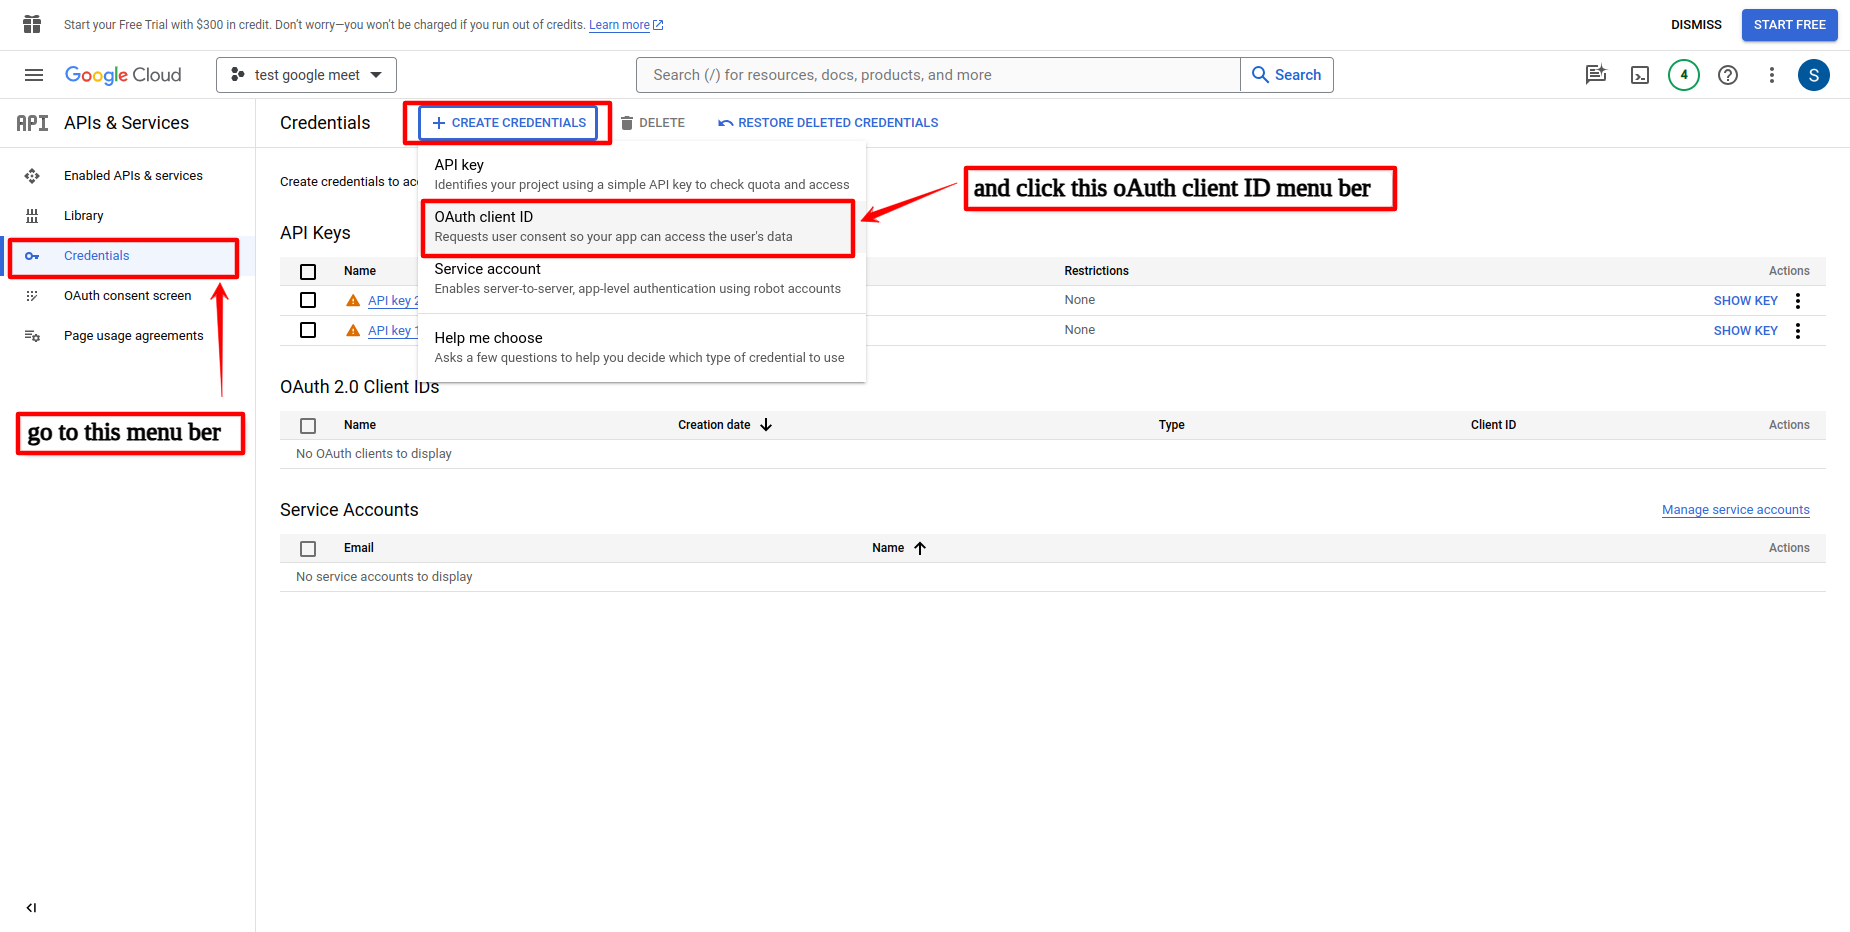
Step:10
- After going through all steps of
OAuth consent screengo toCredentialsmenu bar and click onOAuth client ID... !
Step:11
- Here Application type should be
web applicationandAuthorized redirect URLsshould be taken from the project. ... !
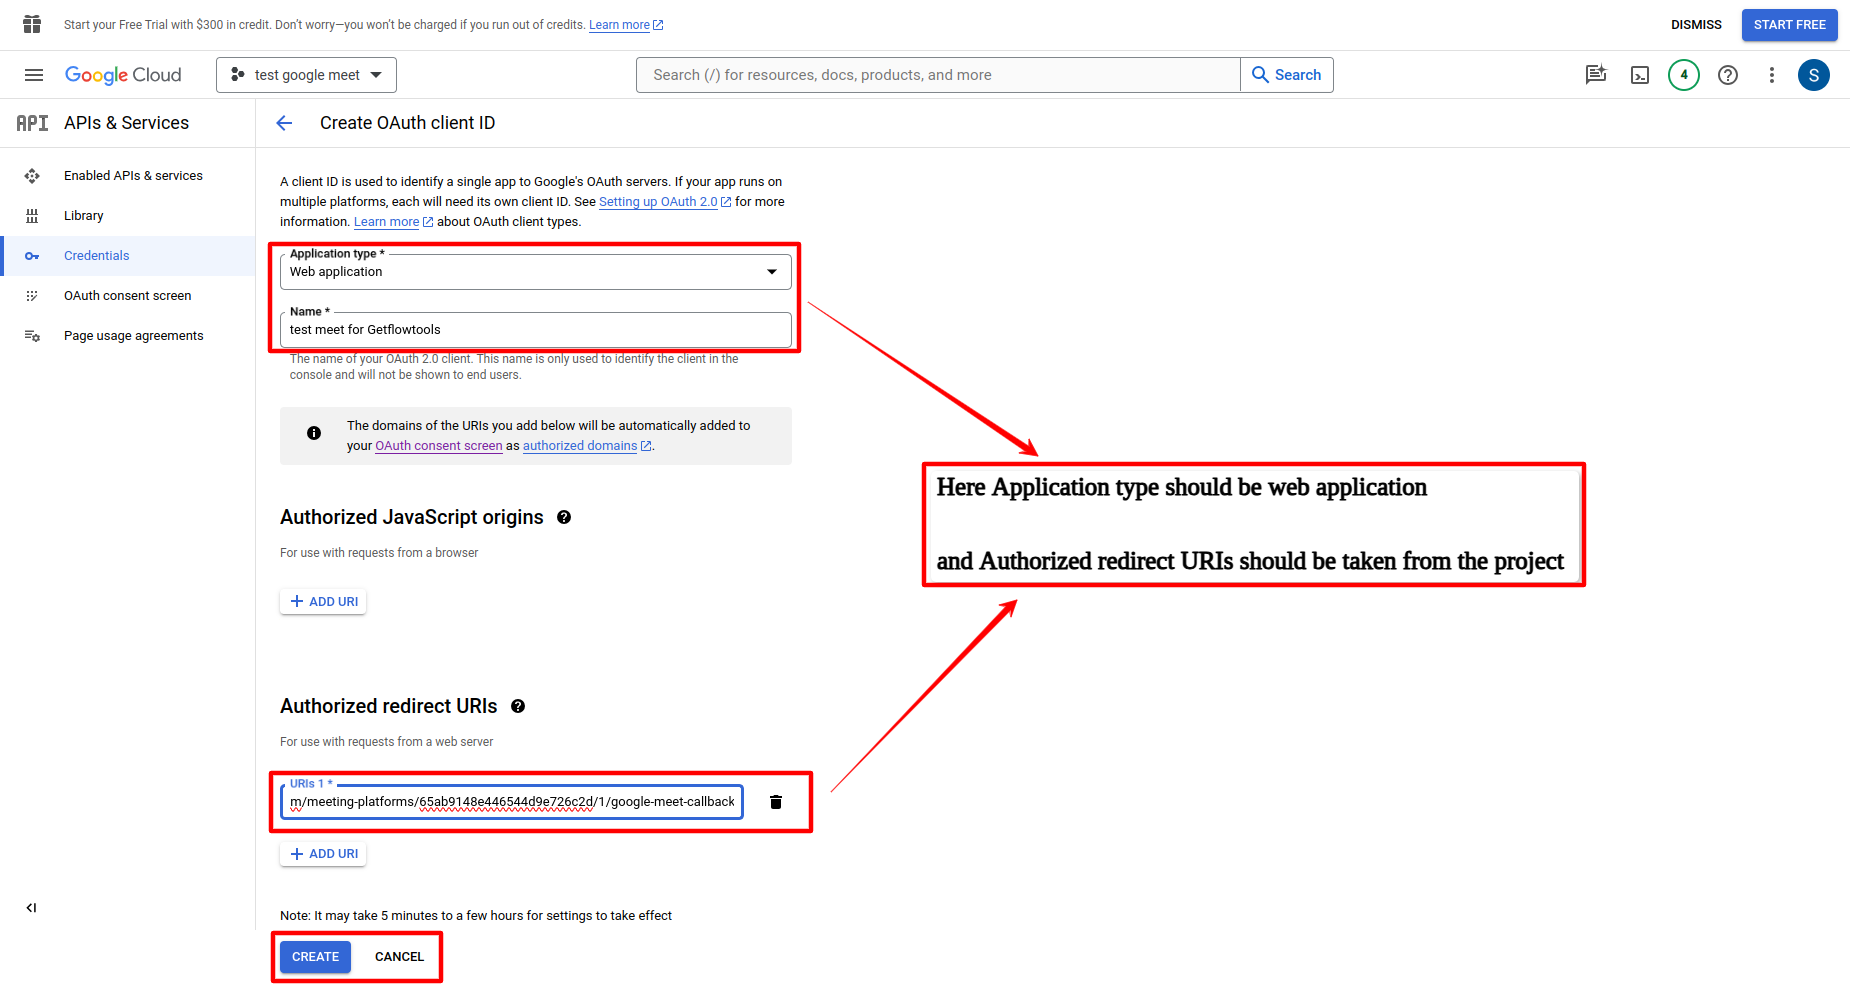
- Here the Authorized redirect URLs ....!

Step:12
- Here the
Client IDorClient secret... !

Zoom Configuration
Create a Project on Google Cloud Console:
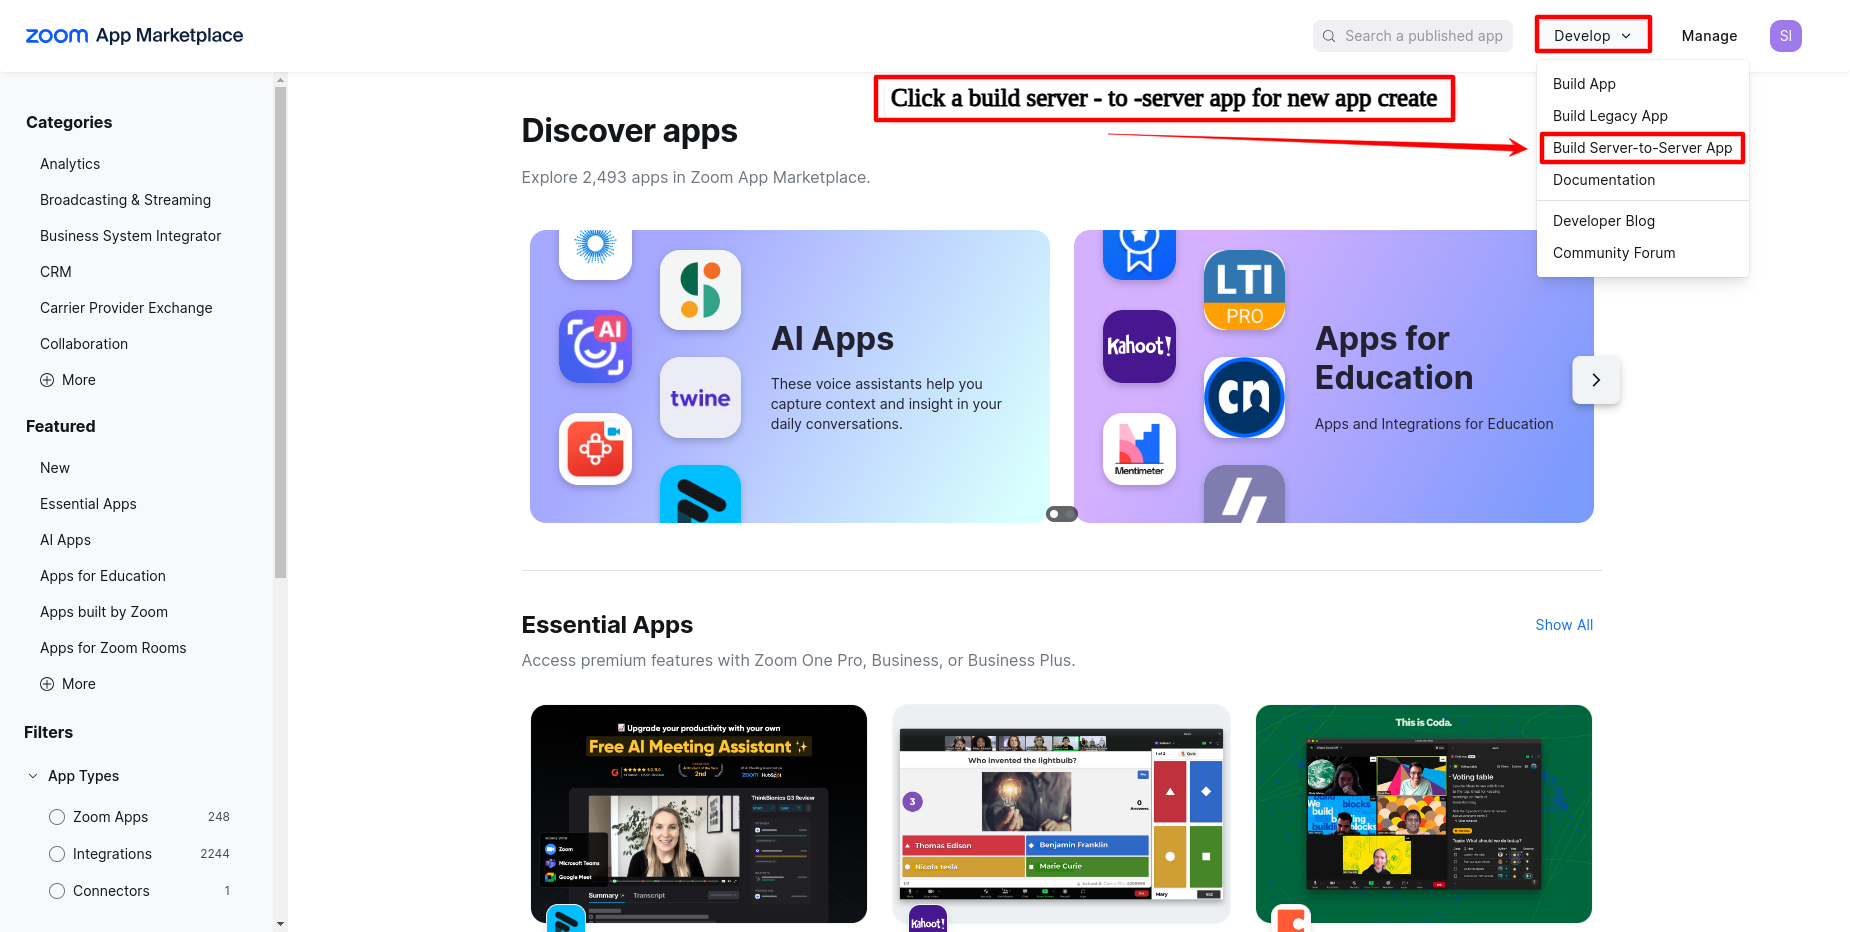
Step:1
- Go to the
Marketplace Zoom US, sing up and click a(build server-to-server app)for newAppCreate ... !
https://marketplace.zoom.us
- Give me a zoom app name create
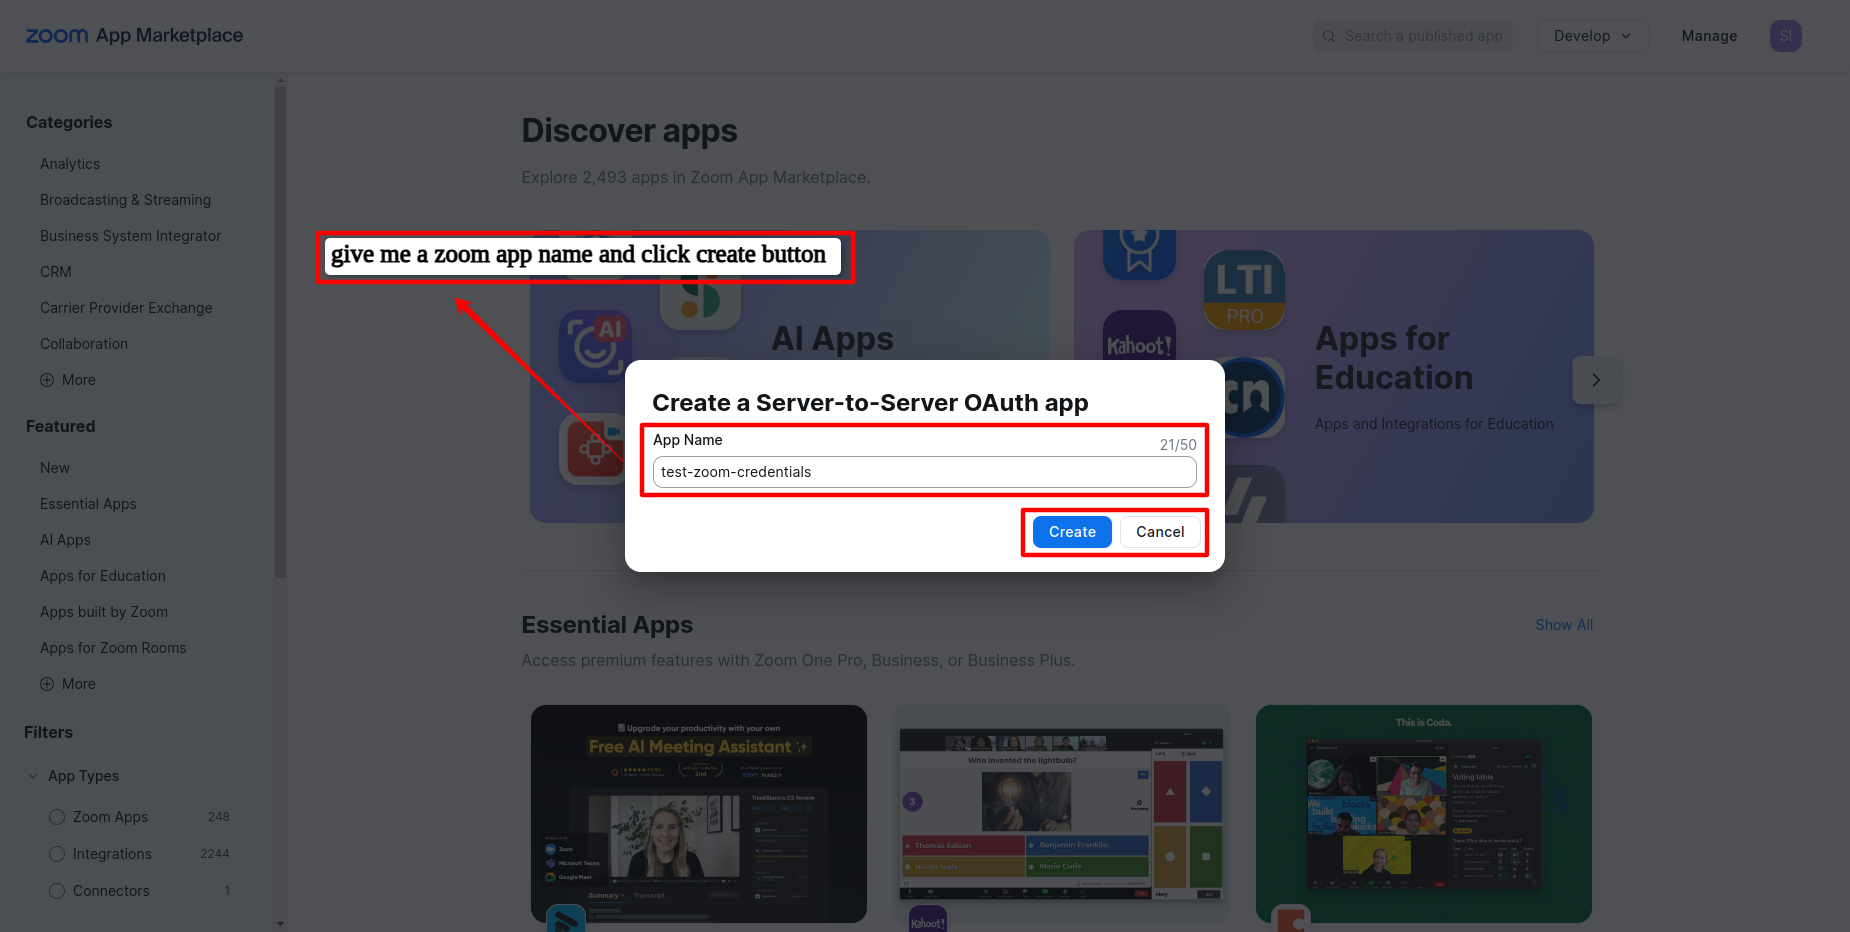
Step:2
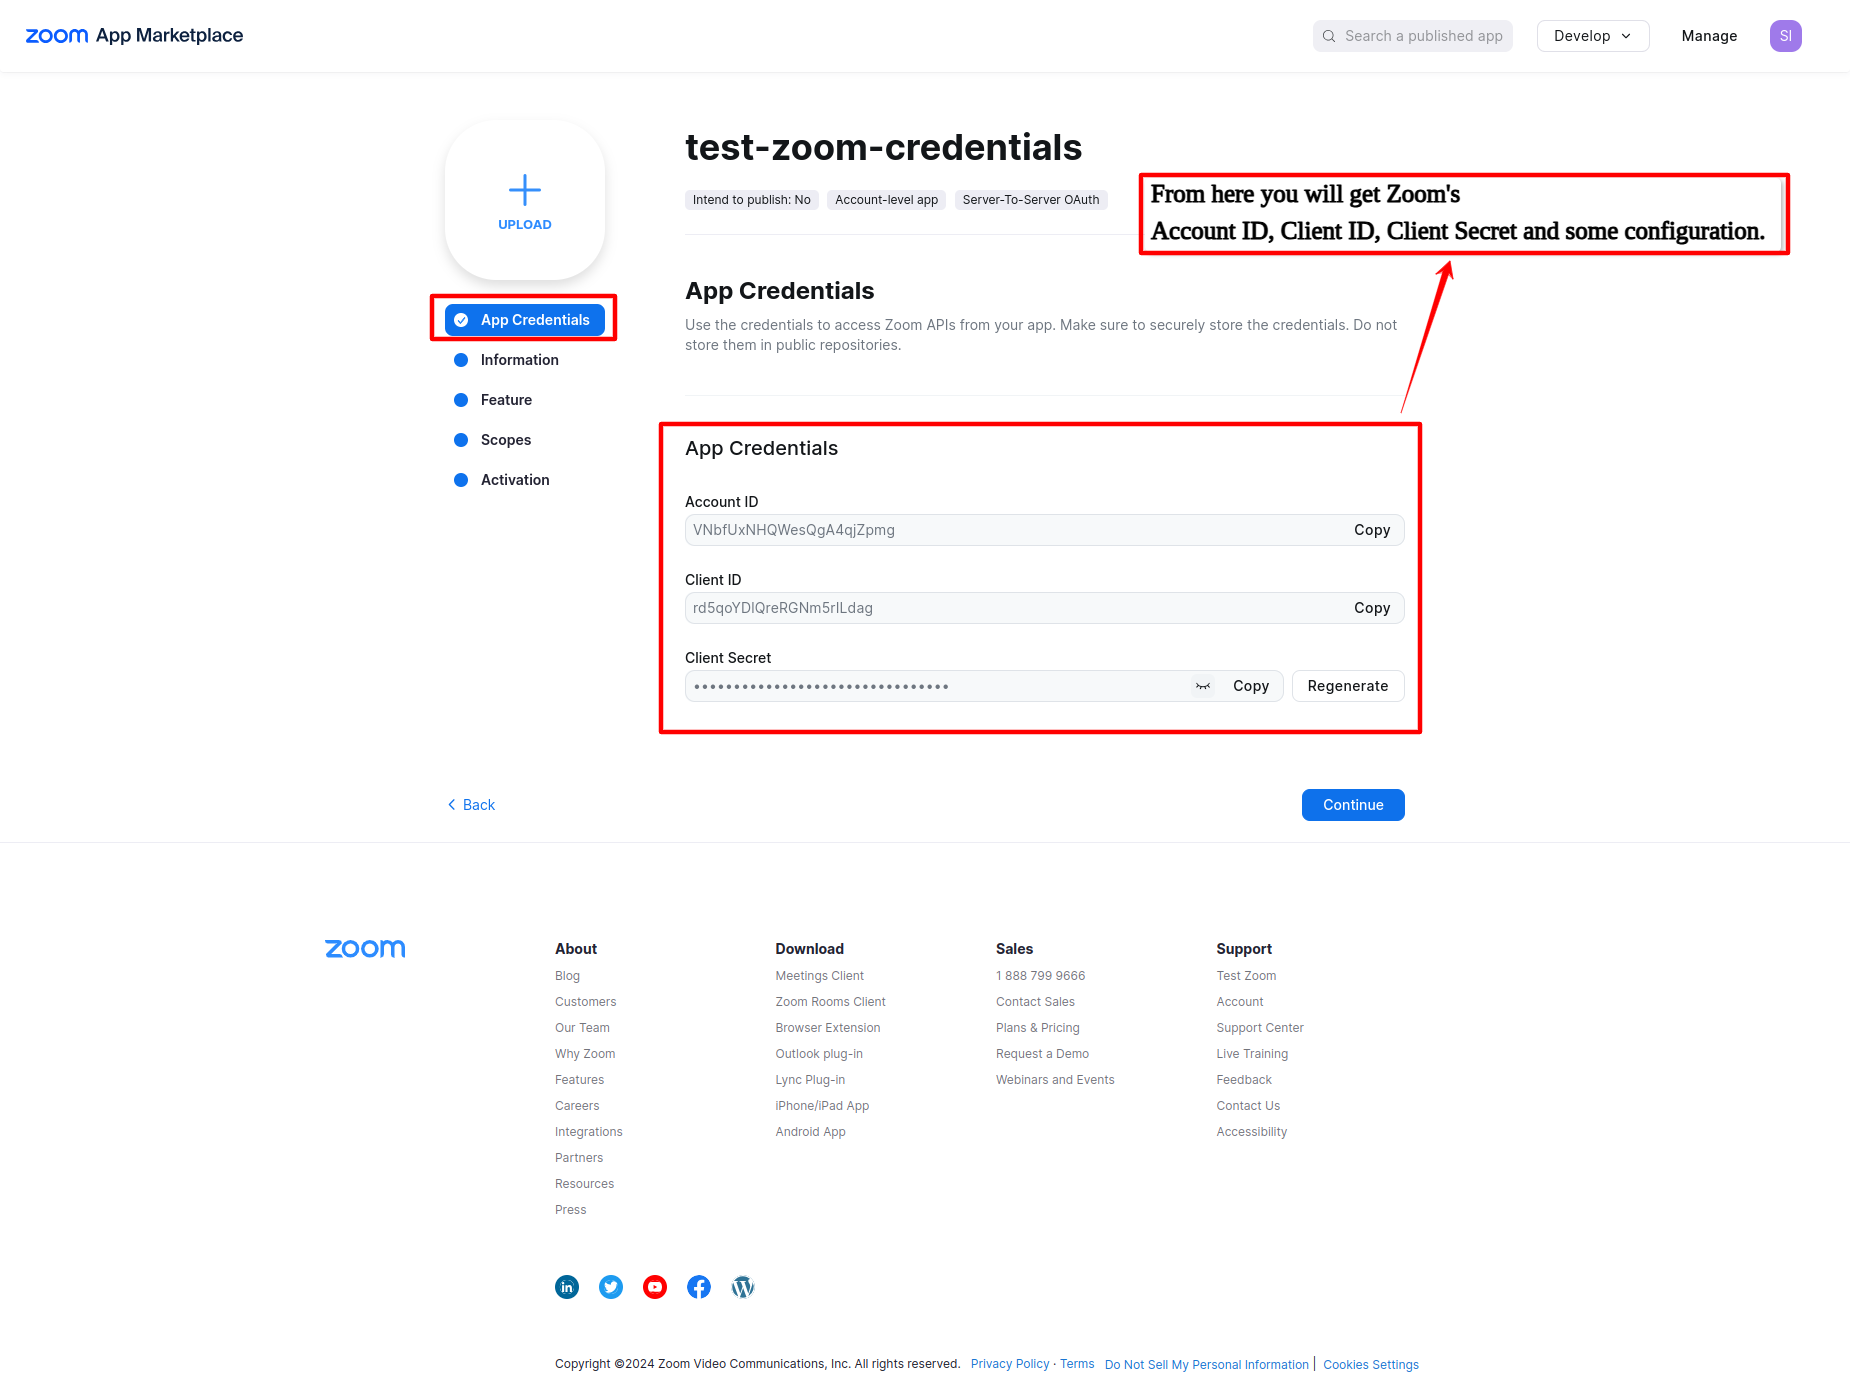
- Then From here you will get Zoom's
Account ID, Client ID, Client Secretand some configuration. ... !
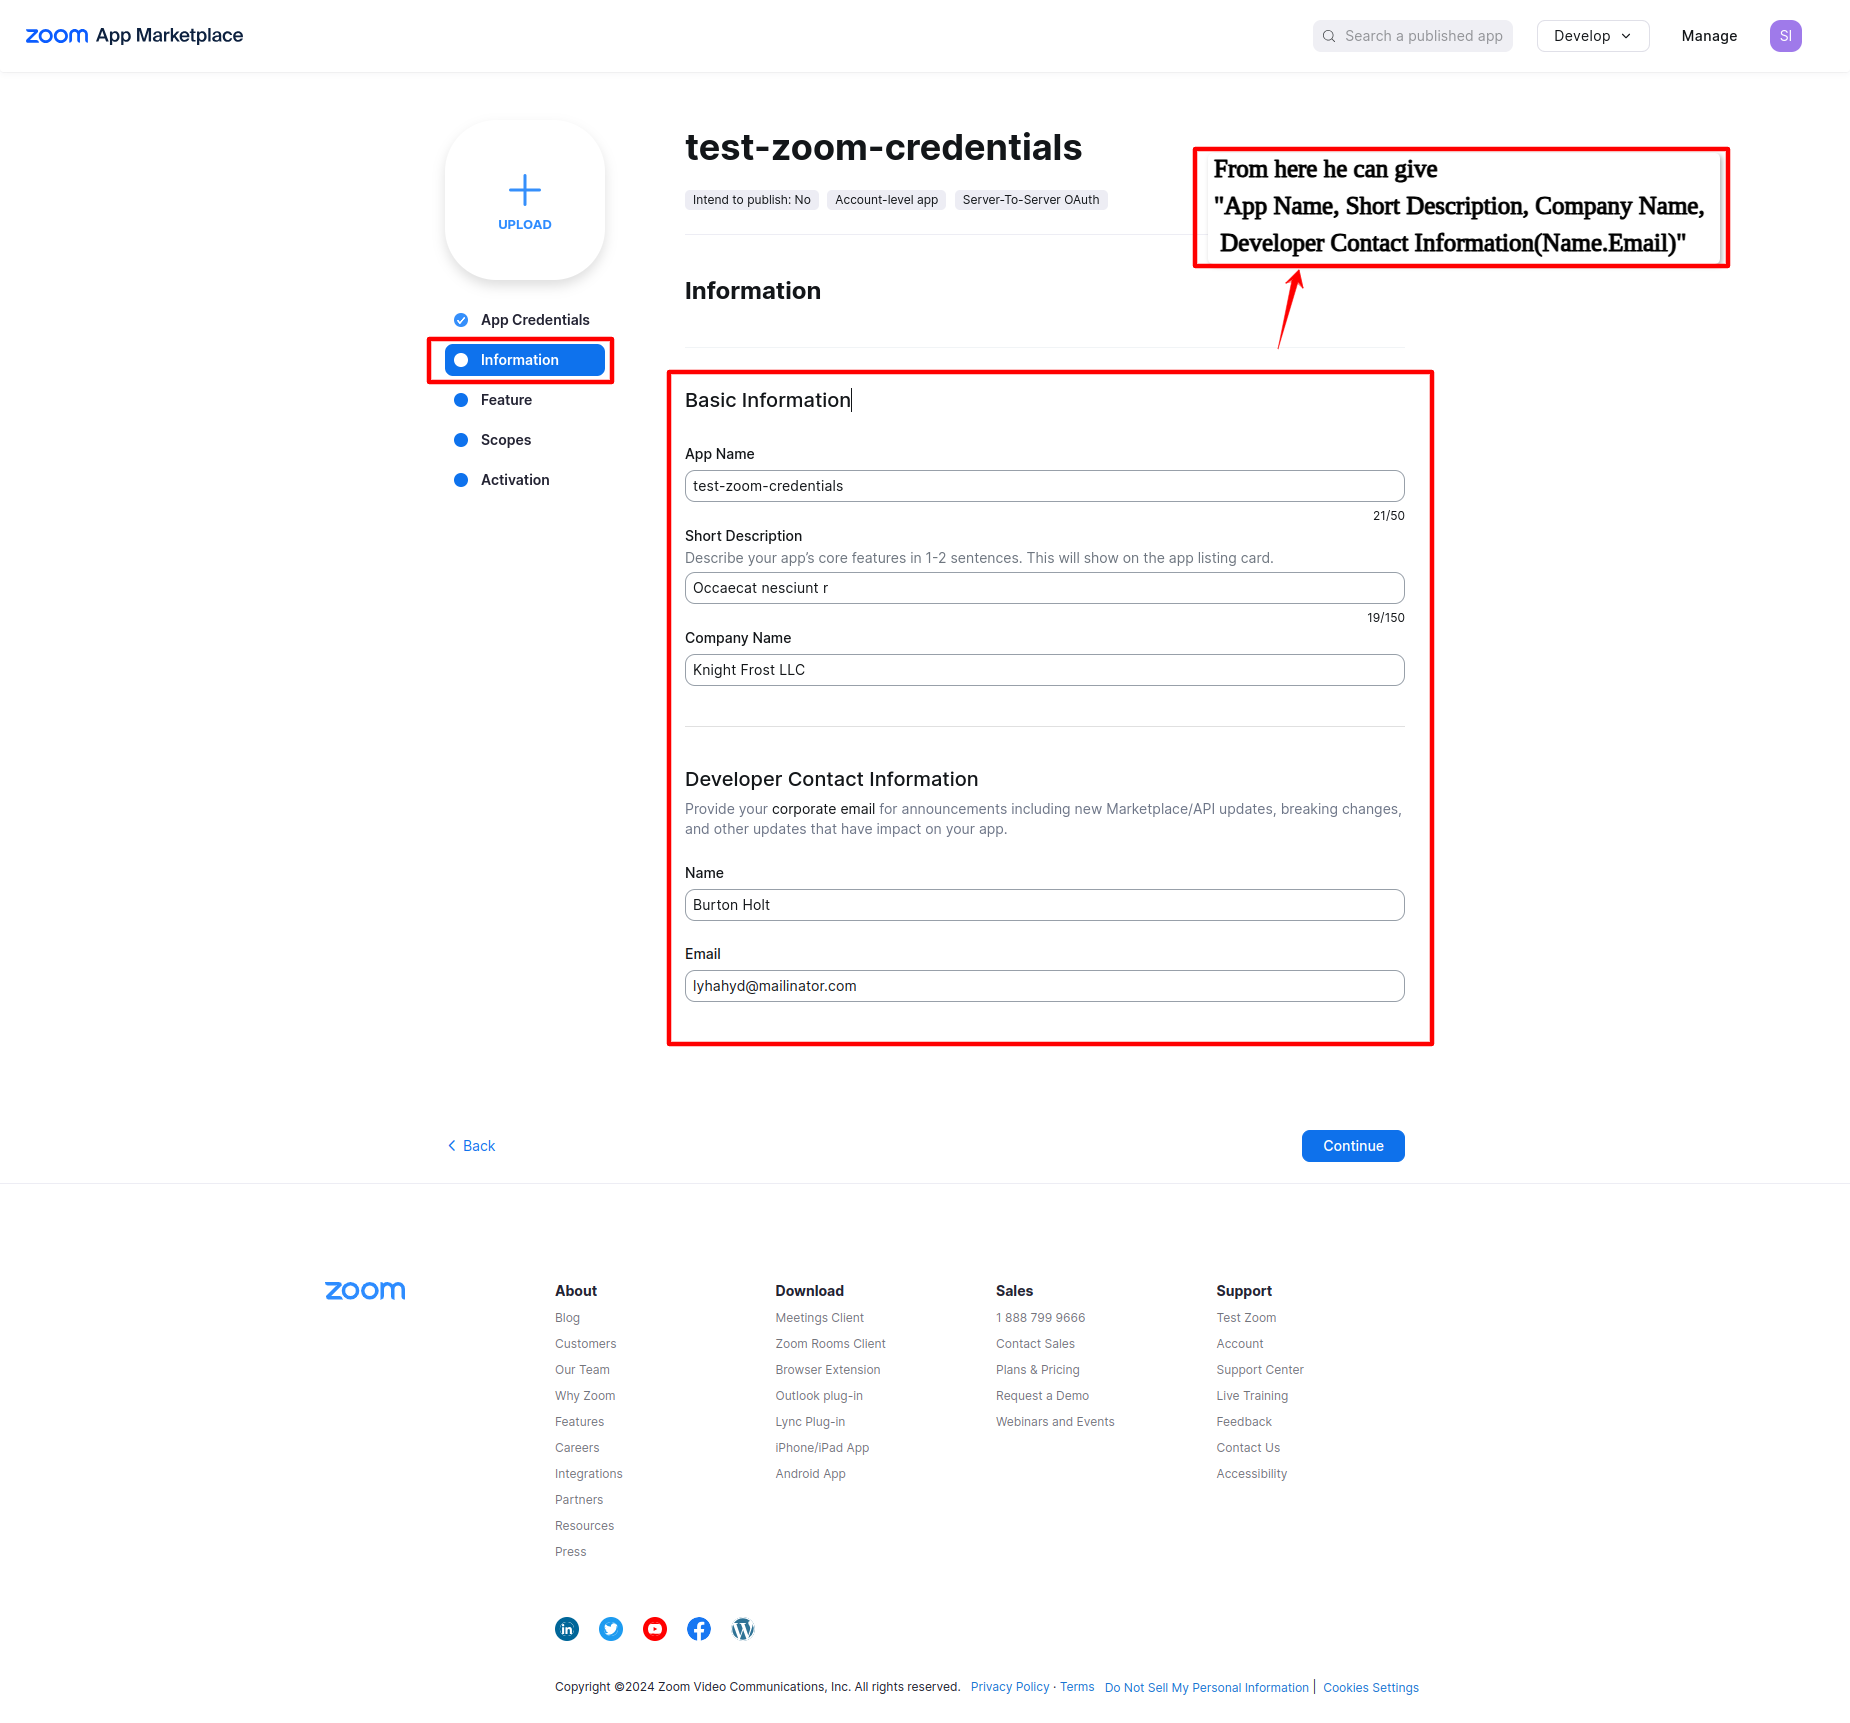
Step:3
- From here user can give me
App Name, Short Description , Company Name , Developer Contact Information (Name.Email). ... !
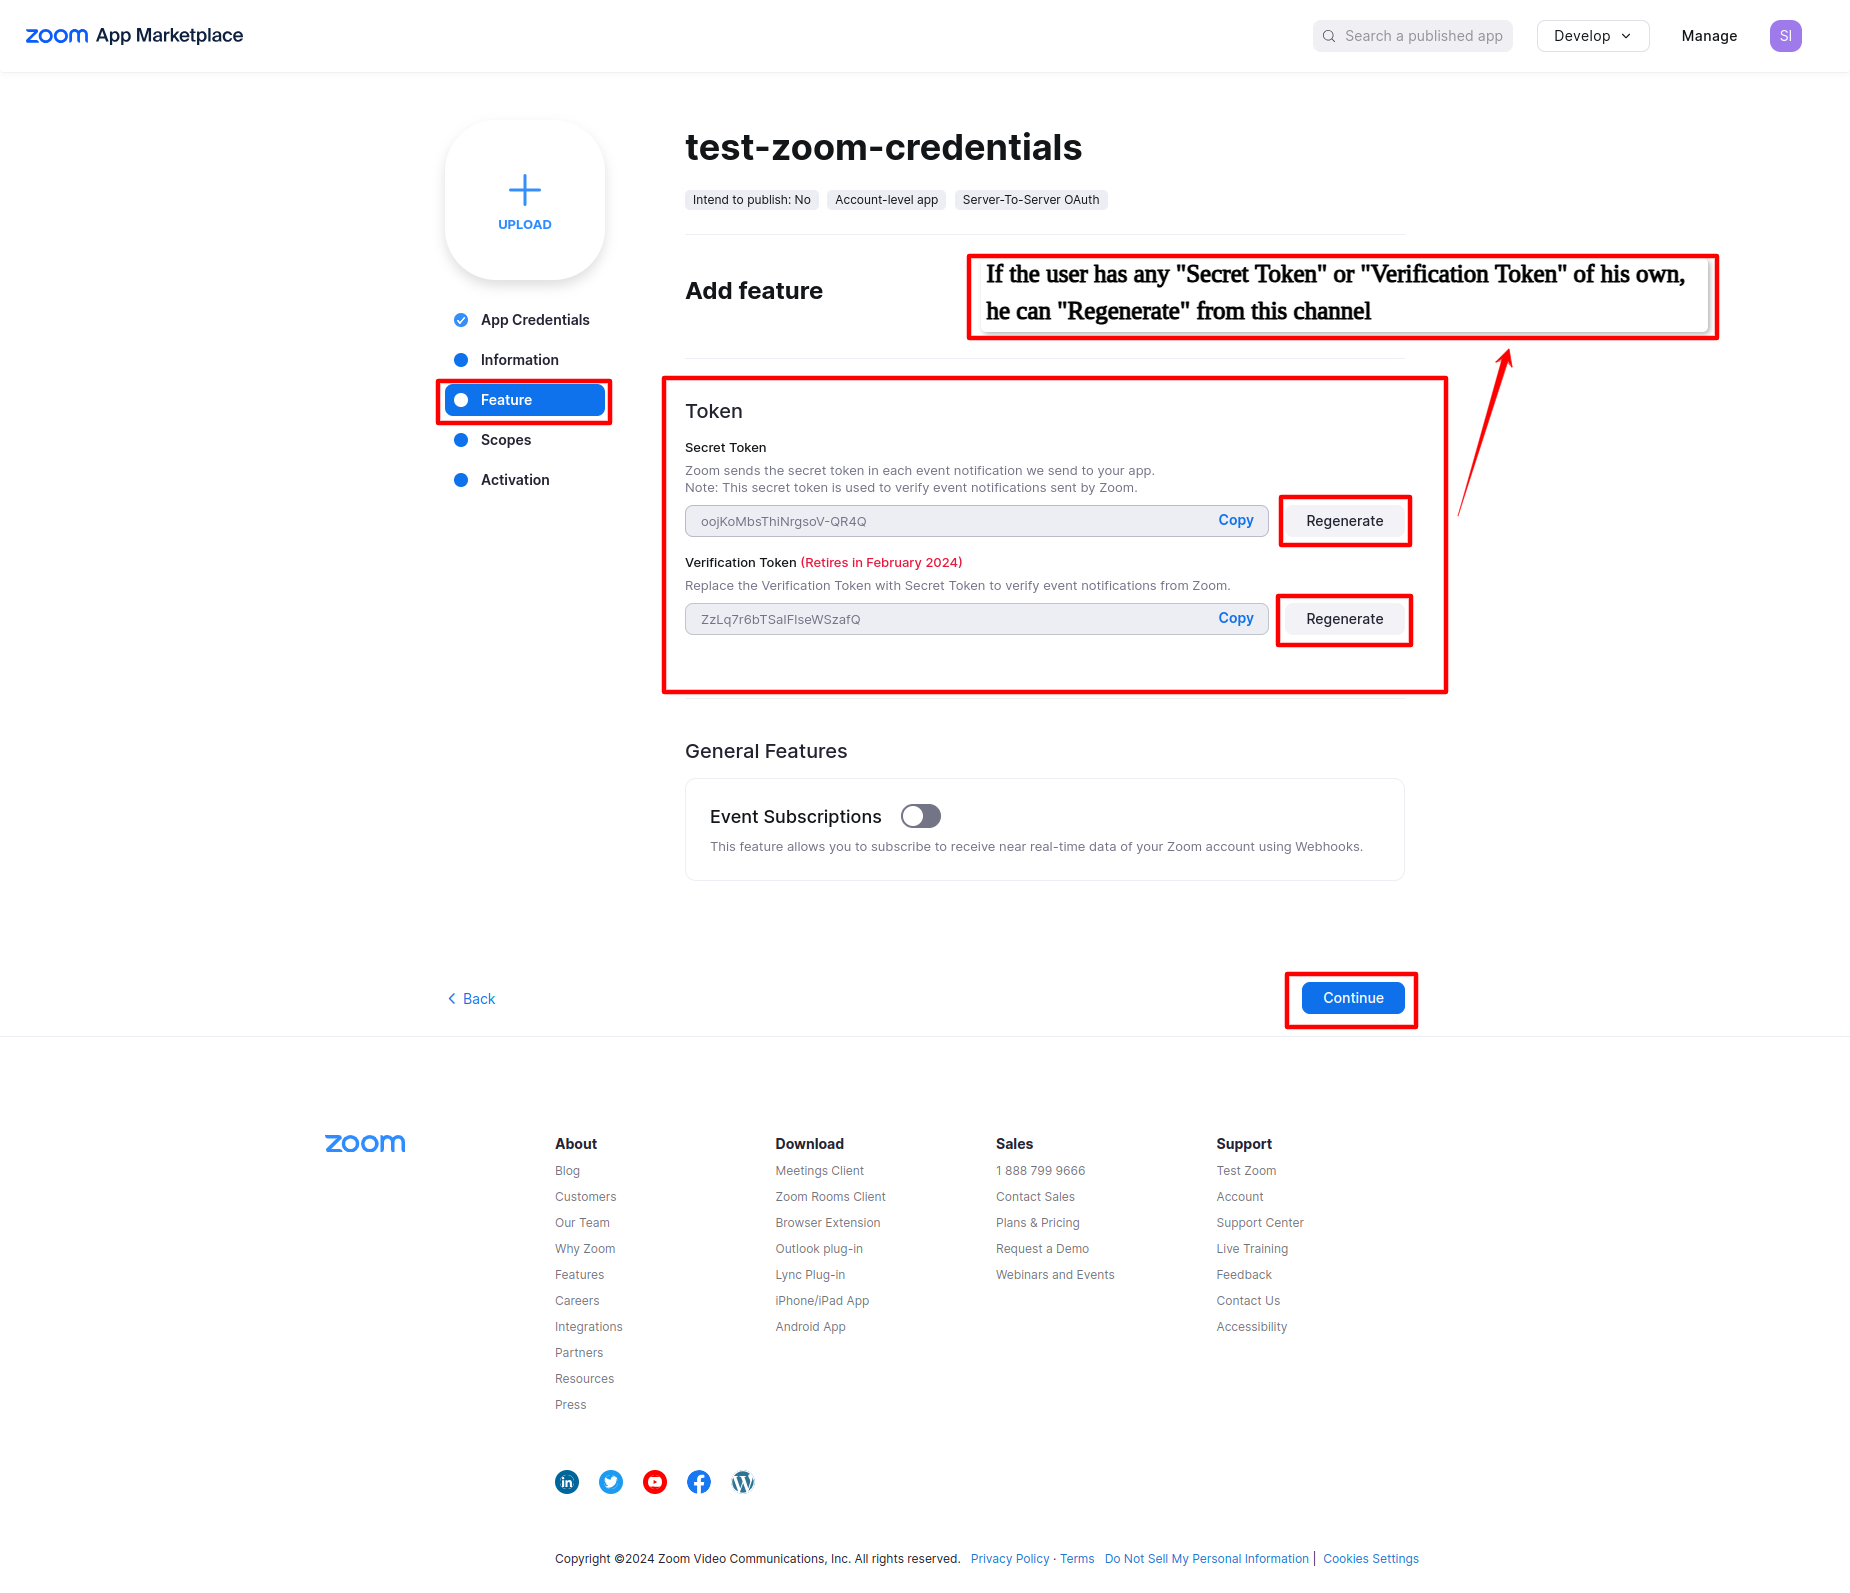
Step:4
- If the user has any
Secret TokenorVerification Tokenof his own, he canRegeneratefrom this channel ... !
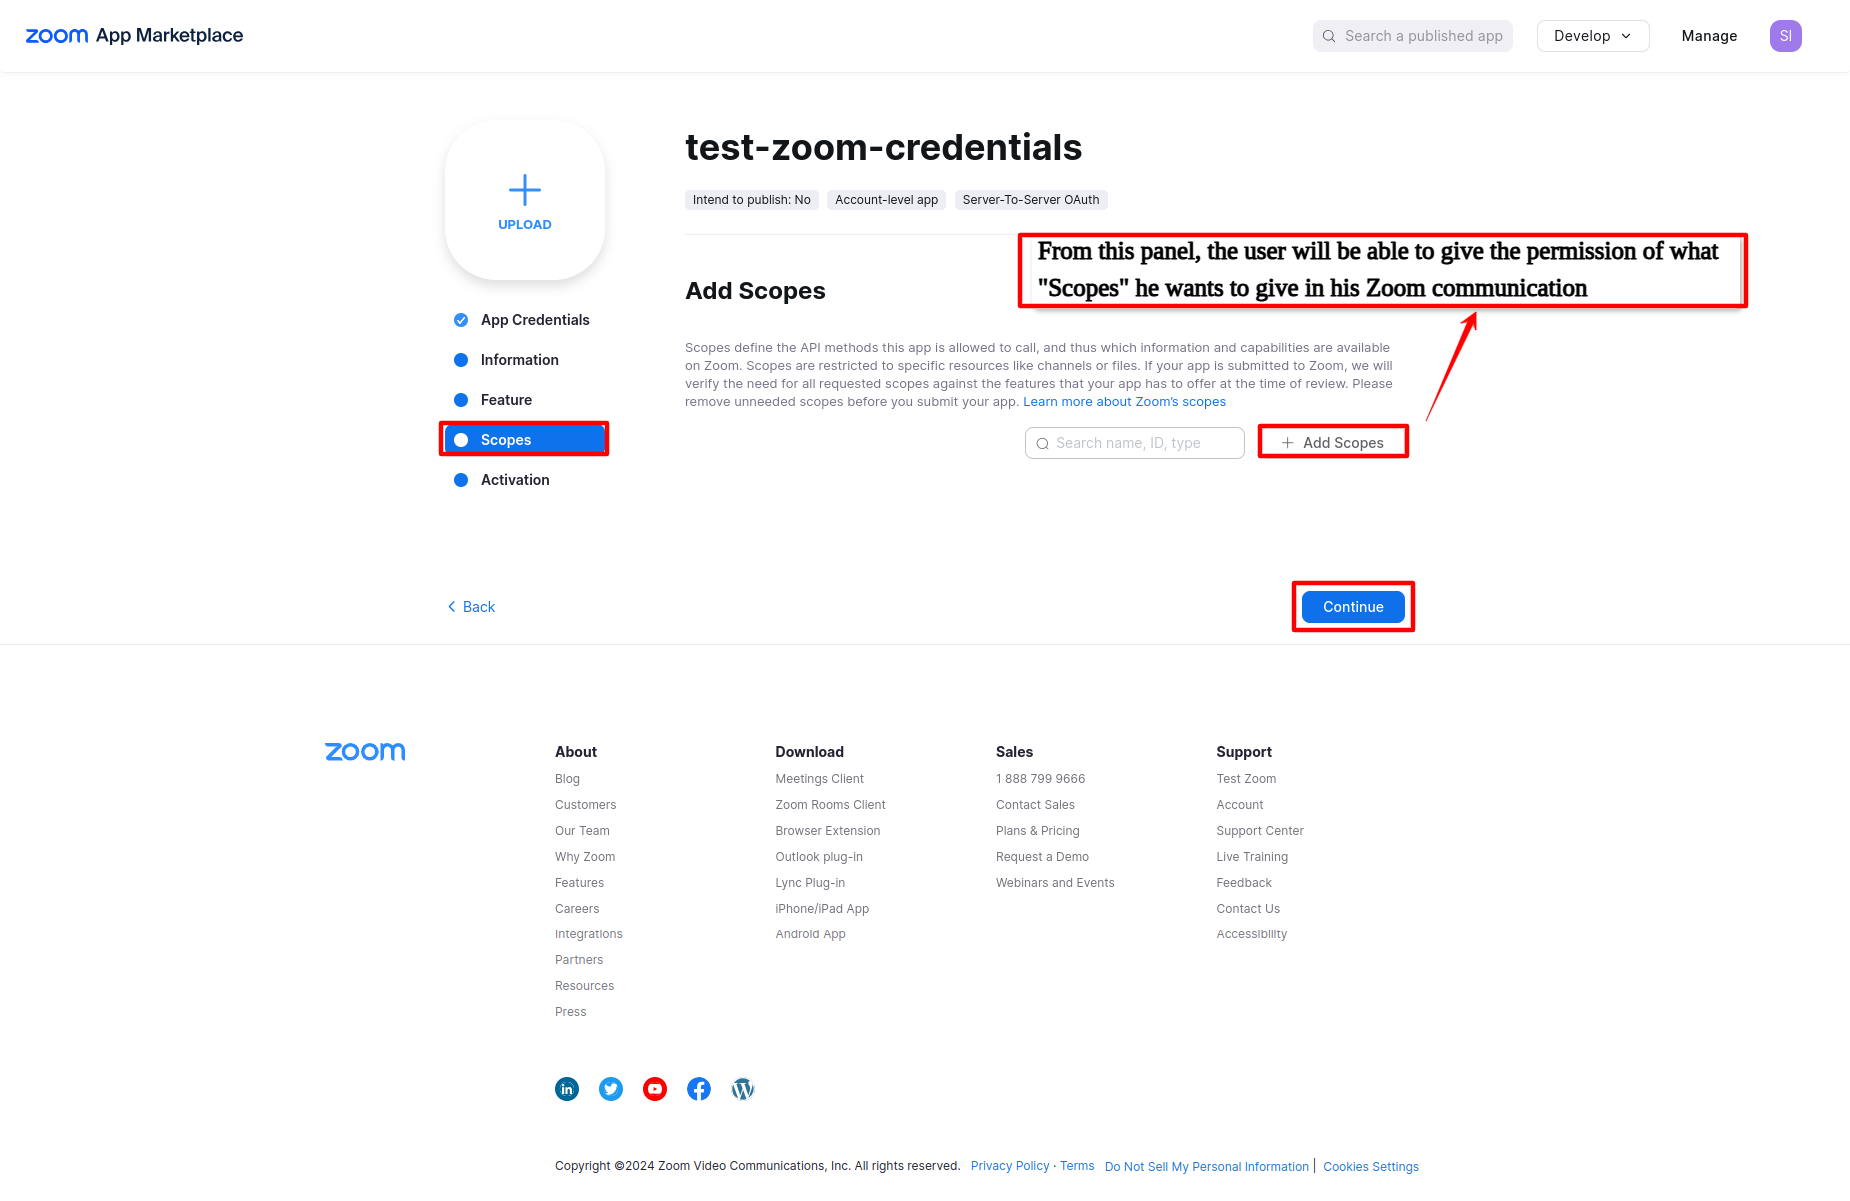
Step:5
- From this panel , the user will be able to give the permission of what
Scopeshe wants to give in theZoom Communication. ... !
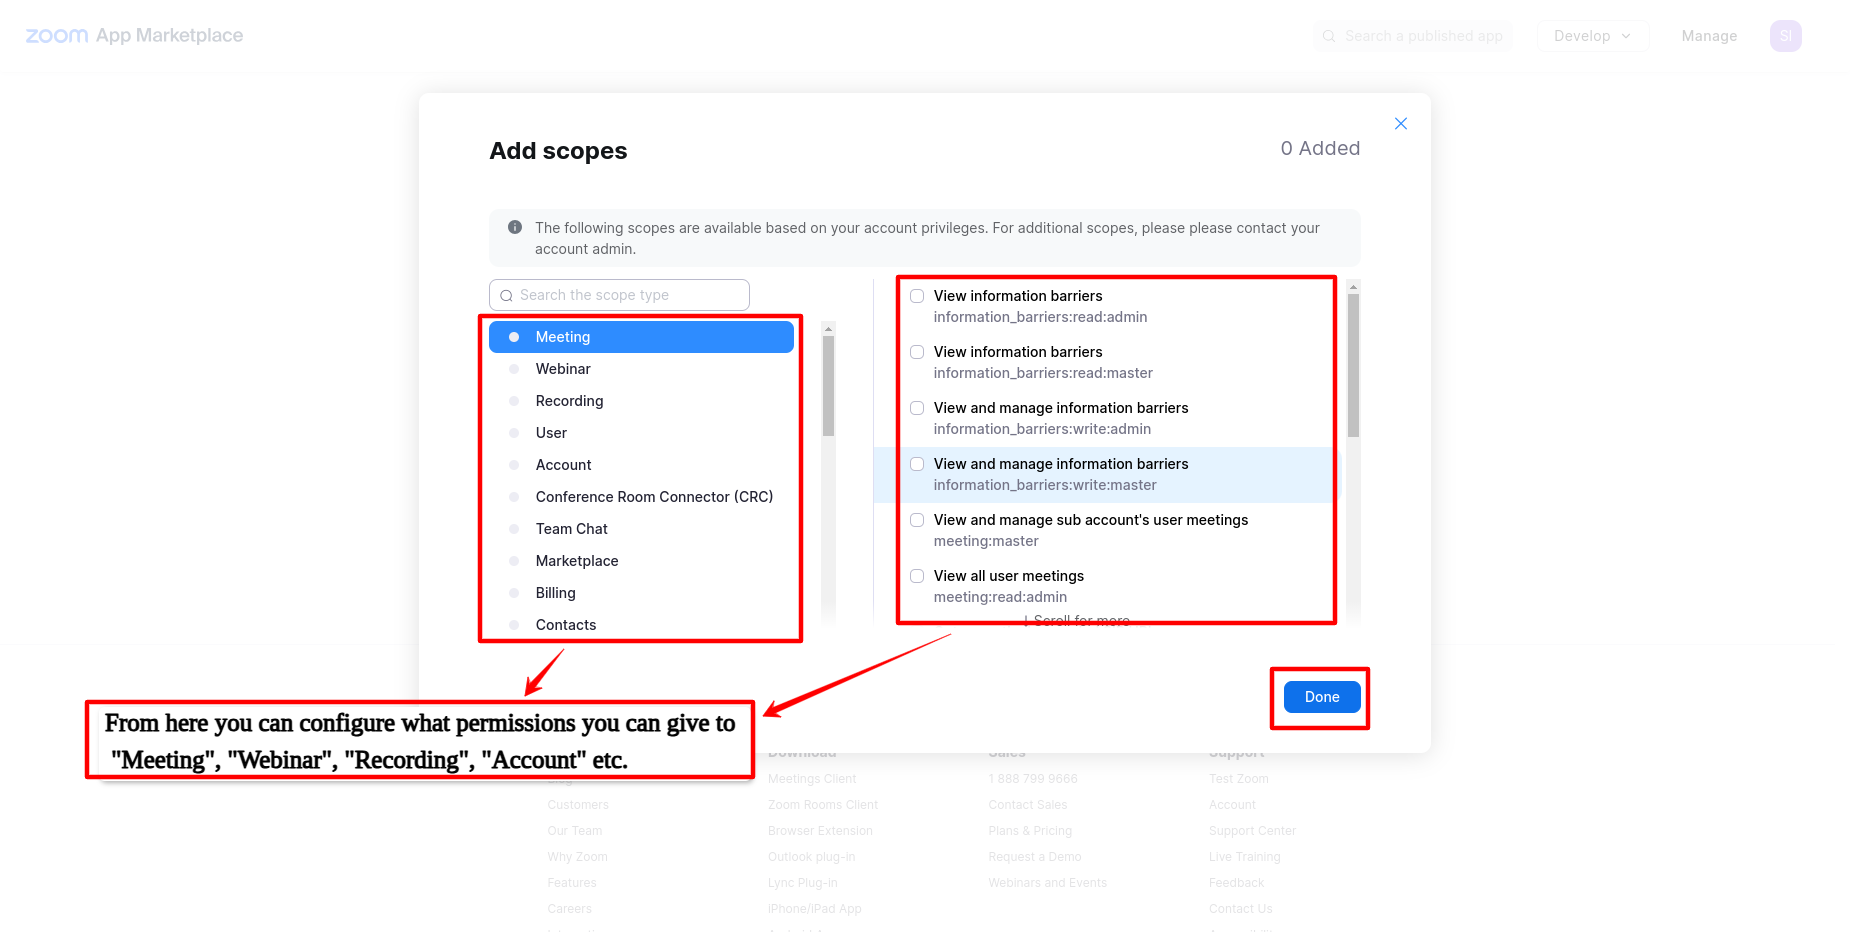
Step:6
- From here you can configure what permissions you can give to
Meeting,Webinar,Recording,Accountetc. ... !
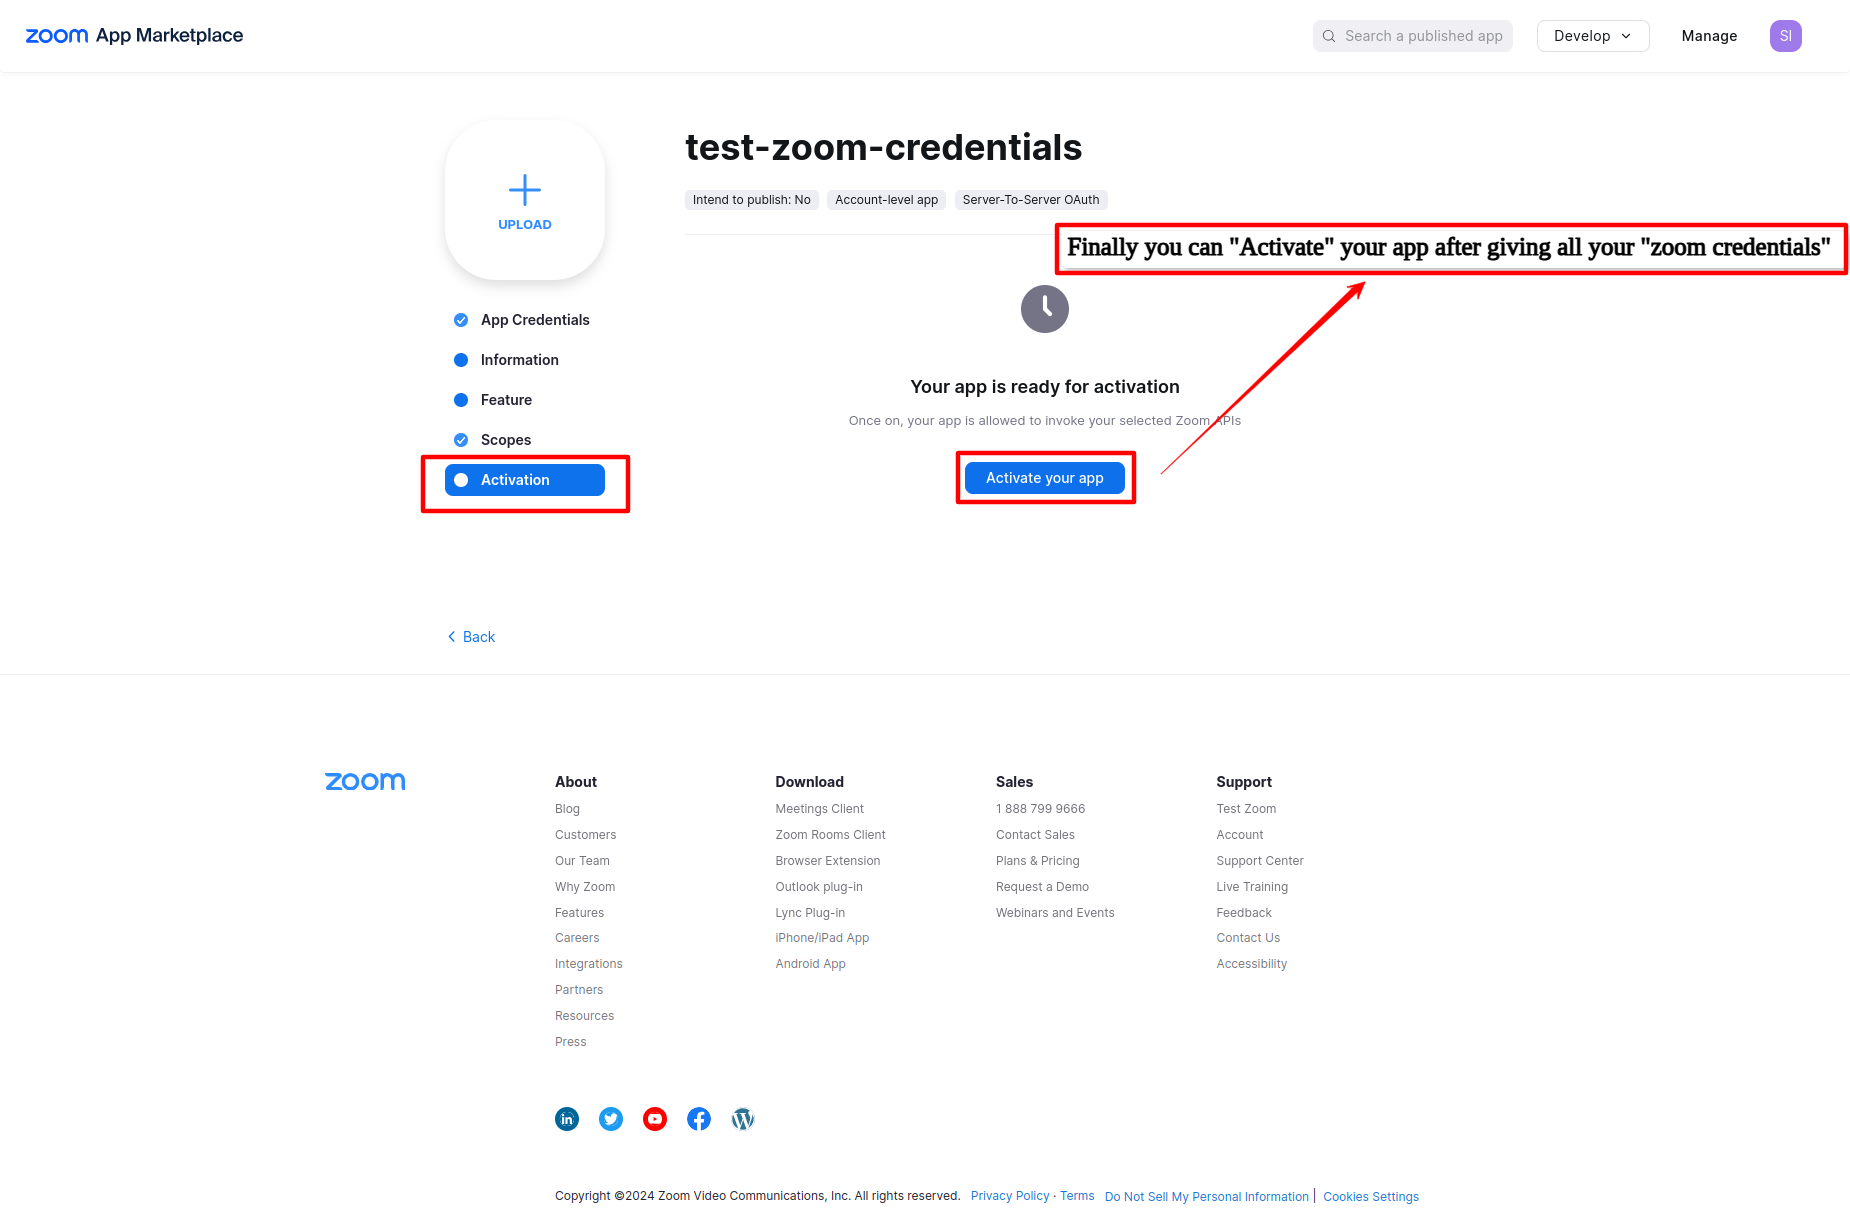
Step:7
- Finally you can
Activateyour app after giving all yourzoom credentials. ... !
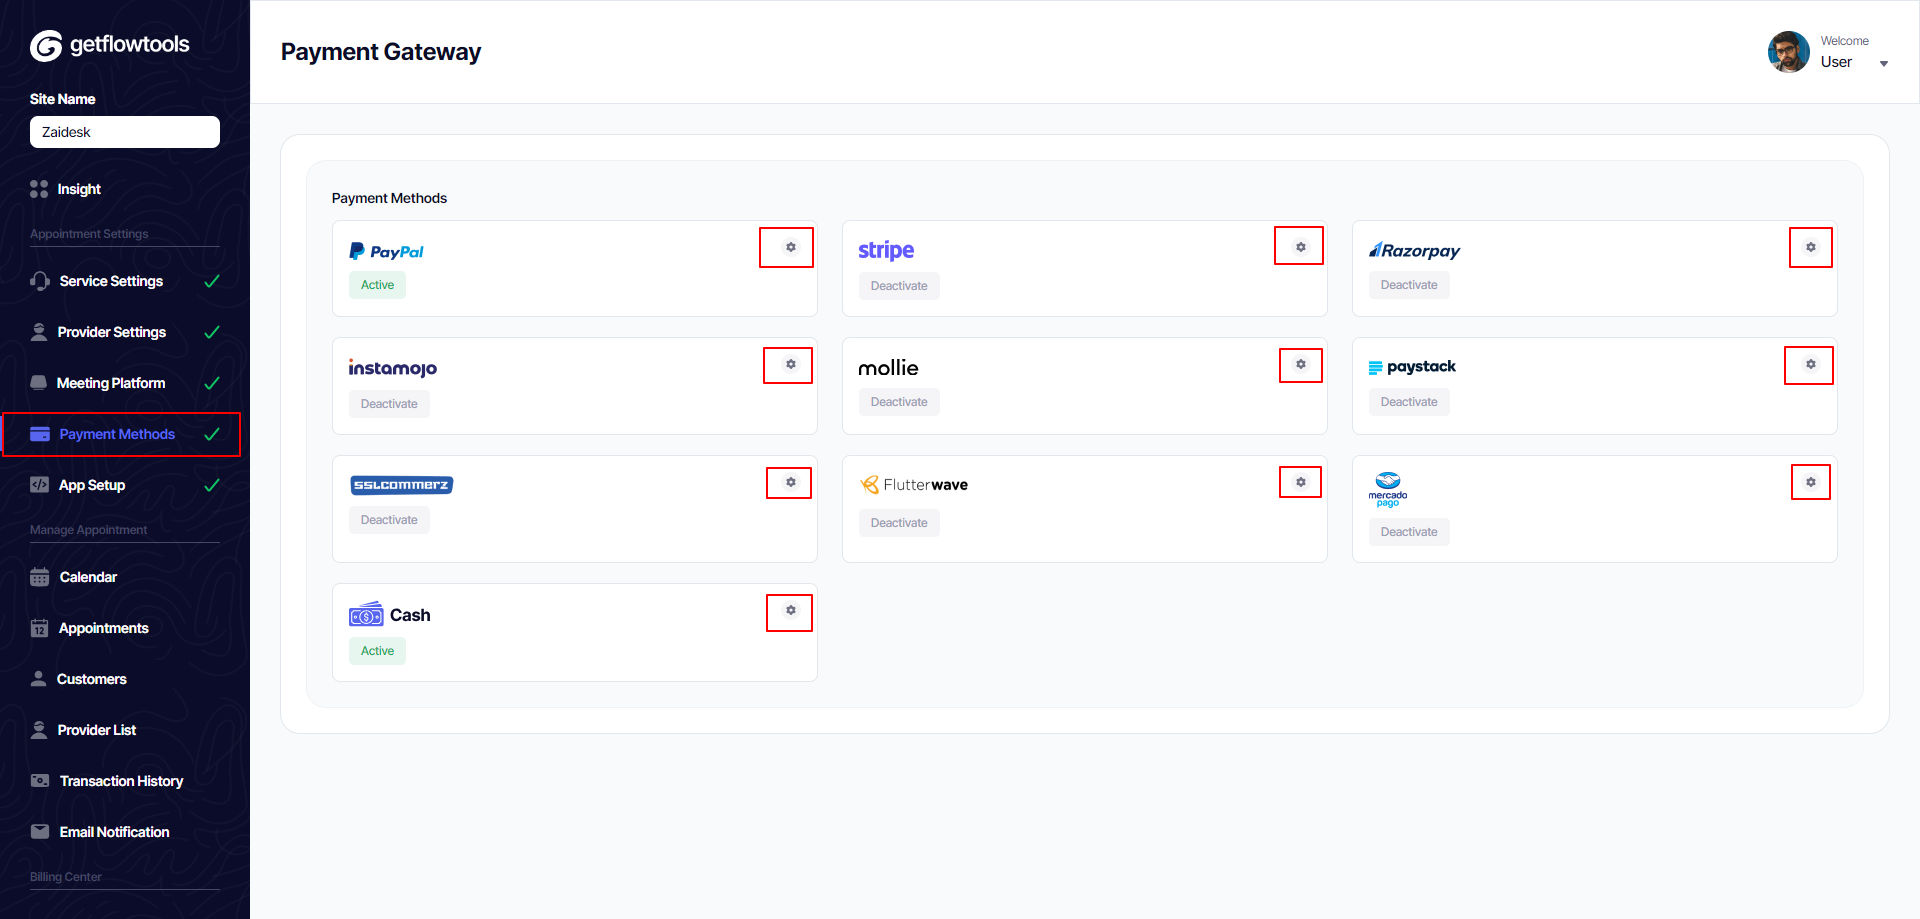
Payment Configuration
- User can update his own gateway credential by clicking on
settings icon and click on editin this panel.
Paypal Gateway
- step:1
You have to log in to paypal and set up get client ID and client secret key from here link.
https://developer.paypal.com/api/rest/
- step:2
Client ID with its Secret key from the above link should also be given here or you can set the Conversion Rate as per your wish here.

Stripe Gateway
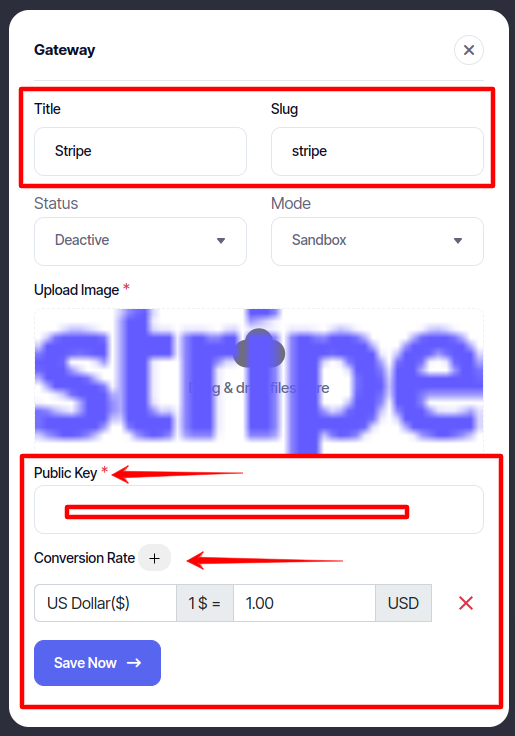
- step:1
You have to log in to stripe and set up get secret key from here link
https://stripe.com/docs/keys
- step:2
Secret key from the above link should also be given here or you can set the Conversion Rate as per your wish here.
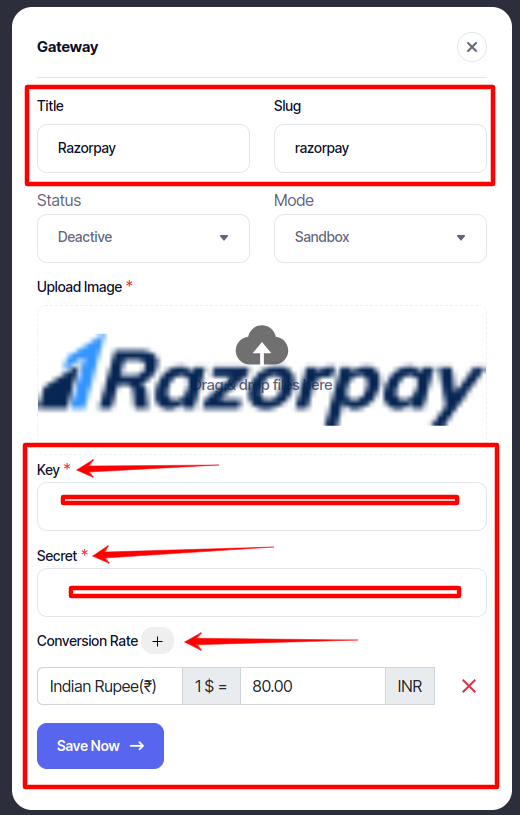
Razorpay Gateway
- step:1
You have to log in to Razorpay and set up get Api Key or Auth Token from here link
https://razorpay.com/docs/payments/magic-checkout/logistics-partners/ithink-logistics
- step:2
Api Key or Auth Token from the above link should also be given here or you can set the Conversion Rate as per your wish here.
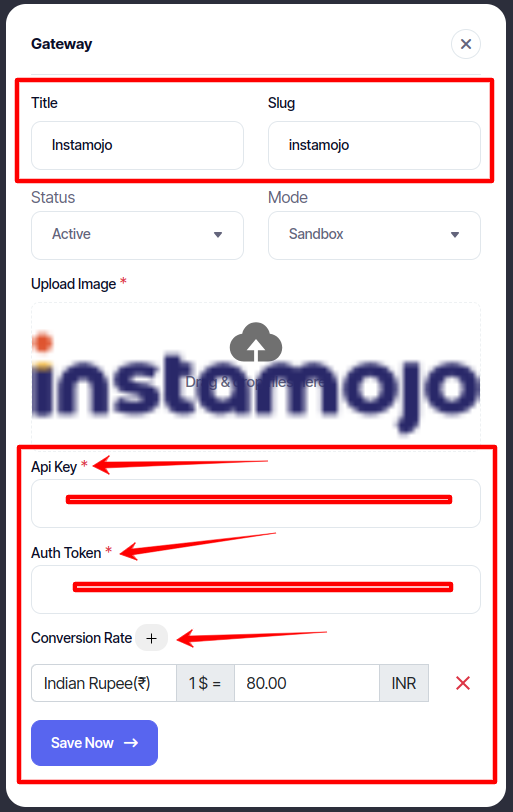
Instamojo Gateway
- step:1
You have to log in to Instamojo and set up get Api Key or Auth Token from here link
https://docs.instamojo.com/reference/overview-and-setup-1
- step:2
Api Key or Auth Token from the above link should also be given here or you can set the Conversion Rate as per your wish here.